How to Import Fonts into Illustrator
How to import fonts into Illustrator? It’s a question that plagues even seasoned designers sometimes! Getting the perfect font into your Illustrator project is crucial for that polished, professional look. This guide will walk you through the different methods, troubleshooting common issues, and even sharing some pro tips for managing your font library. Let’s dive in and unlock the font-importing secrets!
We’ll cover everything from understanding compatible font formats like OTF and TTF to mastering the various import techniques within Illustrator. I’ll show you how to identify and fix corrupted fonts, organize your font collection efficiently, and even utilize advanced font features like stylistic sets. By the end, you’ll be a font-importing ninja!
Understanding Font Formats Compatible with Illustrator: How To Import Fonts Into Illustrator
So you’re ready to jazz up your Illustrator designs with some killer fonts? Before you dive in, it’s crucial to understand which font formats play nicely with Adobe Illustrator. Knowing this will save you headaches and ensure a smooth workflow. Let’s explore the world of font compatibility!
Font Formats Supported by Illustrator
Choosing the right font format is key to a seamless design process. Illustrator supports a variety of formats, each with its own strengths and weaknesses. The following table summarizes the most common ones:
| Format | Description | Common Uses | Compatibility Issues |
|---|---|---|---|
| OTF (OpenType Font) | A sophisticated font format capable of holding a vast array of glyphs and features, including advanced typographic controls. | Professional publishing, web design, graphic design; supports a wide range of languages and characters. | Generally excellent compatibility, but very old versions of software might have limited support for some advanced features. |
| TTF (TrueType Font) | A widely used font format known for its cross-platform compatibility and relatively small file sizes. | General-purpose use, web design, desktop publishing; good for basic typography needs. | May lack the advanced typographic features of OTF fonts. |
| WOFF (Web Open Font Format) | A compressed font format specifically designed for web use. It’s often used for embedding fonts on websites. | Web design, online publishing; improves website loading speed by compressing font files. | Primarily used for web; might not be ideal for all desktop publishing tasks. Illustrator supports it, but OTF or TTF are generally preferred for print design. |
| SVG (Scalable Vector Graphics) | While not strictly a font format, Illustrator can utilize SVG fonts for specific design needs. These fonts are often used for icons or illustrations. | Web design, icon creation, unique illustrative typography. | Limited typographic capabilities compared to OTF and TTF; not suitable for body text. |
OpenType (OTF) vs. TrueType (TTF) Fonts, How to import fonts into illustrator
While both OTF and TTF fonts are widely compatible with Illustrator, there are key differences. OpenType fonts (OTF) generally offer more advanced typographic features than TrueType fonts (TTF). These advanced features include support for a wider range of characters (especially useful for multilingual projects), OpenType features like ligatures (where two or more characters combine to form a single glyph), and more sophisticated kerning (adjusting the spacing between individual letter pairs).
TTF fonts are simpler and often result in smaller file sizes, making them suitable for web use where download speeds are a concern. For most design projects, OTF offers a richer typographic experience, while TTF provides a reliable, widely compatible alternative.
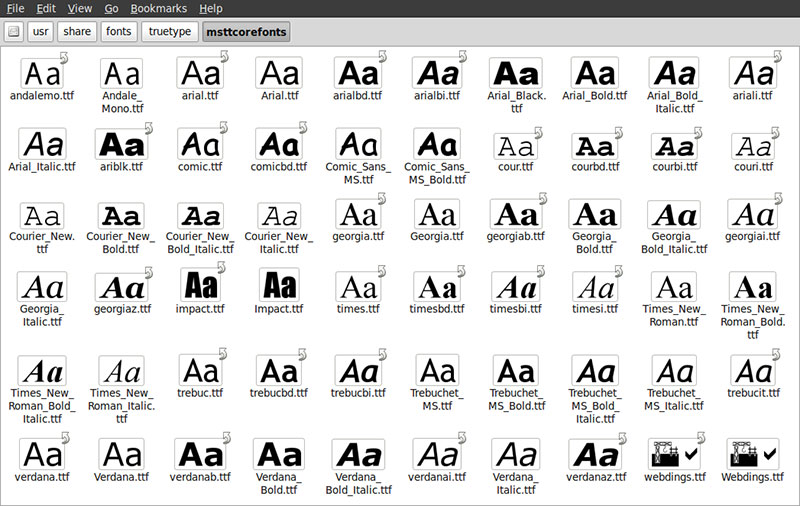
Verifying Font File Integrity
Before importing any font into Illustrator, it’s wise to check its integrity. A corrupted font file can lead to errors or unexpected display issues. One simple check is to try opening the font file in a dedicated font viewer or font management application. These programs often provide information about the font’s structure and can detect potential errors. If the font viewer reports any problems, replace the font file with a fresh copy from a trusted source.
Another method is to try installing the font on your operating system; if the installation fails, the font file is likely corrupted.
Methods for Importing Fonts into Illustrator
So you’ve got your amazing new font, and you’re ready to use it in your Illustrator project. But how do you actually get it into the program? Don’t worry, it’s easier than you think! There are several ways to import fonts into Illustrator, each with its own pros and cons. Let’s explore three of the most common methods.
Adding Fonts Through the System Font Menu
This is the most straightforward method, leveraging your operating system’s font management capabilities. It’s a great option for fonts you intend to use frequently across various applications.
- Step 1: Install the Font. Before you can use a font in Illustrator, you need to install it on your computer. This usually involves double-clicking the font file (typically a .otf or .ttf file). Your operating system will then guide you through the installation process. A pop-up window might appear, showing a preview of the font and allowing you to install it.
- Step 2: Restart Illustrator (Optional but Recommended). Sometimes, Illustrator doesn’t immediately recognize newly installed fonts. Restarting the application ensures that the font list is refreshed and updated, allowing Illustrator to see the new addition.
- Step 3: Select Your Font. Open your Illustrator document. When selecting a font from the Character panel (usually located in the top menu bar, it’s usually represented by a capital “T”), you should now see your newly installed font among the available options. If you don’t see it immediately, try searching for the font name in the font menu.
This method is simple and generally reliable. However, a disadvantage is that if you uninstall the font from your system, it will no longer be available in Illustrator.
Adding Fonts Directly Within Illustrator (Using the Font Menu)
While not a direct “import,” this method effectively adds fonts to your current Illustrator session without needing to install them system-wide. This is useful for testing fonts or using fonts that you don’t want permanently installed on your system.
- Step 1: Open the Font Menu. In the Character panel (the “T” icon in the top menu bar), click on the font name dropdown menu. This menu displays all currently available fonts within Illustrator.
- Step 2: Add Fonts. At the bottom of this menu, you’ll often find an option that says something like “Add Fonts” or a similar phrasing. Clicking this will open a file browser window.
- Step 3: Locate and Select. Navigate to the location of your font file (.otf or .ttf). Select the font file and click “Open”. The font should now appear in your font menu within the current Illustrator session.
The advantage here is that it’s temporary; you don’t clutter your system fonts. However, the disadvantage is that the font will only be available during that specific Illustrator session. Closing and reopening Illustrator will require you to repeat this process.
Using Font Libraries (Creative Cloud Libraries)
For those who use Adobe Creative Cloud, utilizing Creative Cloud Libraries offers a centralized and organized method for managing and accessing fonts across multiple Adobe applications.
- Step 1: Access Creative Cloud Libraries. Open the Libraries panel in Illustrator (usually accessible via the Window menu). If you don’t see it, go to Window > Libraries.
- Step 2: Add Fonts. In the Libraries panel, click the “+” icon to add a new library or select an existing one. Then, click the “+” icon again, but this time choose the option to add fonts. A file browser will appear, allowing you to locate and select your font file(s).
- Step 3: Sync and Access. Once added, the fonts will sync across your Creative Cloud account. You can access them from any computer where you are logged into your Creative Cloud account, making them readily available in your Illustrator projects.
Creative Cloud Libraries offer excellent organization and cross-application accessibility. The drawback is that it requires a Creative Cloud subscription and relies on an internet connection for syncing.
Managing Imported Fonts within Illustrator
Source: ytimg.com
So, you’ve successfully imported your fonts into Illustrator – congratulations! Now comes the crucial part: keeping them organized and easily accessible. A well-managed font library is essential for a smooth and efficient workflow, preventing frustrating searches and accidental mismatches. Let’s dive into how to effectively manage your fonts within Illustrator.
Illustrator’s font panel, while seemingly simple, offers several features that significantly impact your workflow. Understanding these features and employing some best practices will dramatically improve your experience, especially when dealing with a large collection of fonts.
Font Panel Organization
The Illustrator font panel displays all available fonts, allowing you to quickly select one for your project. You can organize this panel to improve visibility and reduce clutter. While Illustrator doesn’t offer direct folder-like organization within the panel itself, you can achieve a similar effect by using naming conventions for your fonts. For example, you might prefix fonts by category (e.g., “Serif-TimesNewRoman”, “SansSerif-Arial”, “Script-Edwardian”).
This allows you to visually group fonts within the alphabetical list. Additionally, you can use the search function in the font panel to quickly locate specific fonts based on their names.
Best Practices for Managing a Large Font Library
Maintaining a large font library requires a structured approach to prevent confusion and maintain efficiency. Here are some key strategies:
Effective font management isn’t just about what’s in Illustrator, but also how your fonts are stored on your computer. A well-organized system outside of Illustrator makes importing and managing fonts much easier.
- Categorize your fonts: Create folders on your computer to organize fonts by style (serif, sans-serif, script, etc.), weight (light, regular, bold, etc.), or even by project. This makes finding the right font significantly faster.
- Use descriptive font names: Avoid generic names like “Font1” or “NewFont.” Instead, use descriptive names that clearly identify the font’s style and weight (e.g., “OpenSans-Regular,” “PlayfairDisplay-BoldItalic”).
- Regularly audit your font library: Periodically review your installed fonts and remove any unused or outdated fonts. This reduces clutter and improves performance.
- Utilize font management software: Consider using dedicated font management software (like FontExplorer X Pro or Suitcase Fusion) for more advanced features like font activation/deactivation, font searching, and backup/restore capabilities. These tools can greatly simplify managing a large font collection.
- Create font sets for projects: For specific projects, create a dedicated folder containing only the fonts you need. This prevents accidentally using the wrong font and simplifies the process of sharing project files.
Activating and Deactivating Fonts within a Project
While you can’t directly activate or deactivate fontswithin* the Illustrator project file itself, you can control which fonts are available to the program. By deactivating fonts system-wide (through your operating system’s font management or a dedicated font manager), you effectively remove them from Illustrator’s font panel. This is particularly useful for managing large libraries. Conversely, activating fonts makes them available for use.
Remember to restart Illustrator after making changes to your system fonts for the changes to take effect. This method ensures that only the necessary fonts are loaded into memory, which can improve performance, especially on systems with limited resources.
Troubleshooting Font Import Issues

Source: wikihow.com
Importing fonts into Illustrator can sometimes be a frustrating experience. While the process is generally straightforward, various issues can crop up, ranging from minor display glitches to complete font failure. Understanding these potential problems and their solutions is key to a smooth workflow. This section will address common font import problems and provide practical solutions.
Font Corruption
A corrupted font file is a common culprit behind import failures. This can manifest in several ways: garbled characters, missing glyphs (symbols or characters), or the font simply not appearing in Illustrator’s font list. The corruption might stem from a damaged download, a faulty installation, or even a virus.Determining if a font file is damaged isn’t always obvious.
Sometimes, you’ll see visible errors like strange characters or missing sections. Other times, the problem is subtle and only becomes apparent when you try to use the font in a design. A good first step is to try opening the font file in another application, such as a dedicated font viewer or a word processor. If the font appears distorted or incomplete in these applications, it strongly suggests corruption.Solutions for font corruption involve either repairing the font (if possible) or finding a replacement.
Unfortunately, repairing a damaged font file is often difficult and not always successful. Specialized font repair software exists, but success is not guaranteed. The most reliable solution is typically to find a fresh, undamaged copy of the font from the original source or a reputable font website. Always download fonts from trusted vendors to minimize the risk of corruption.
Missing Glyphs
Occasionally, you might import a font and discover that certain characters are missing. This isn’t necessarily due to font corruption; it could simply be that the font doesn’t include those specific glyphs. For instance, a basic sans-serif font might not contain specialized symbols or characters from other alphabets. The problem becomes apparent when you type certain characters and see a blank space or a default placeholder instead.To troubleshoot missing glyphs, first verify that the characters you’re trying to use are actually included in the font’s character set.
You can often check this by examining the font’s glyph map (available through font management software or online font viewers). If the glyphs are indeed missing, you’ll need to either choose a different font that contains those characters or use a workaround, such as inserting images of the missing symbols.
Font Rendering Issues
Sometimes, a font might import correctly but render poorly within Illustrator. This could manifest as blurry text, inconsistent spacing, or other visual imperfections. These issues are often related to font hinting, which is a technique used to optimize the font’s appearance at different screen resolutions. Poor hinting can lead to jagged or uneven text, particularly at smaller sizes.To address font rendering problems, try adjusting Illustrator’s anti-aliasing settings.
Anti-aliasing smooths out the edges of text, reducing jaggedness. Experiment with different anti-aliasing options within Illustrator’s preferences to see if this improves the rendering. If the problem persists, consider updating your graphics drivers or checking for conflicts with other software that might be interfering with font rendering. In some cases, the problem might lie with the font itself; a poorly designed font might simply not render well in all applications.
Trying a different font might be the most practical solution in such situations.
Utilizing Imported Fonts in Illustrator Projects
Source: designyourway.net
Now that you’ve successfully imported your fonts into Illustrator, it’s time to put them to good use! This section covers selecting, applying, and managing your newly imported fonts within your design projects to achieve consistent and professional typography. We’ll explore how to easily switch between font styles and maintain a unified look across your artwork.
So you’re ready to spice up your Illustrator projects with some killer fonts? Knowing how to import them is key, and thankfully it’s pretty straightforward. But if you want to share your awesome designs, check out this great guide on getting it on with youtube – it’s a game-changer for boosting your visibility. Then, once your YouTube channel is rocking, you’ll have even more reasons to master importing those perfect fonts into Illustrator for your video thumbnails and more!
Applying your imported fonts is straightforward. Once imported, they become available in the Character panel (Window > Type > Character) and the Paragraph panel (Window > Type > Paragraph). You’ll find them listed alphabetically along with your system fonts. This ensures easy access and selection, regardless of the number of fonts you’ve imported.
Selecting and Applying Imported Fonts to Text Objects
To apply an imported font to a text object, simply select the text box using the Type tool (T). Then, in the Character panel, locate the “Font Family” dropdown menu. Select your desired imported font from the list. Illustrator will instantly update the selected text to reflect the new typeface. This process is identical whether you’re working with a single word, a paragraph, or multiple text boxes.
For example, if you’ve imported “Bebas Neue” and want to use it for a headline, select the headline text and choose “Bebas Neue” from the font family menu.
Changing Font Styles After Importing
Once a font is applied, you can easily adjust its style using the Character panel. This panel offers options to modify font weight (e.g., Regular, Bold, Light), style (e.g., Italic, Oblique), and other attributes like tracking (letter spacing) and kerning (space between specific letter pairs). For instance, you could change a “Regular” weight font to “Bold” to emphasize a particular word or phrase.
These adjustments are applied in real-time, allowing for immediate visual feedback. Experimenting with different weights and styles can significantly impact the overall aesthetic of your design.
Creating Consistent Typography Across Multiple Artboards or Documents
Maintaining consistent typography across multiple artboards or even different Illustrator documents using your imported fonts is crucial for professional design. One effective strategy is to create a style guide or template. This might involve creating a text box with specific font, size, weight, and color settings. Then, copy and paste this text box to other artboards or documents, ensuring consistency.
Alternatively, you can create and save paragraph and character styles within Illustrator. These styles can be applied across various elements to maintain uniformity in your fonts and formatting. This is especially helpful for large projects or when collaborating with others, ensuring everyone uses the same font settings. For example, if you have a brand guideline specifying a particular font weight for headings, you can create a heading style in Illustrator and reuse it throughout your project.
Working with Font Variations
Many modern fonts offer a wealth of stylistic options beyond the basic weight and style choices. These variations, often powered by OpenType features, allow for fine-grained control over your typography, enabling you to inject personality and sophistication into your designs. Unlocking these features in Illustrator can significantly elevate your work.Accessing and applying these variations is surprisingly straightforward. Illustrator’s Character panel (Window > Type > Character) is your control center.
Depending on the font, you’ll find options for stylistic sets, ligatures, swashes, and more, all neatly organized within the panel’s dropdowns and menus. Experimentation is key to discovering the full potential of your chosen font.
Stylistic Sets and OpenType Features
The Character panel provides direct access to these variations. For example, a font might offer “Stylistic Set 1” and “Stylistic Set 2,” each presenting a unique aesthetic interpretation of the same letterforms. You’ll also find options for individual OpenType features like ligatures (connecting characters like ‘fi’ or ‘fl’ for a more elegant look), swashes (decorative flourishes on letterforms), and small caps.
Selecting these options from the panel immediately applies the changes to your selected text.Let’s imagine a sample text block: “The quick brown fox jumps over the lazy dog.” Using a font with extensive OpenType features, we can illustrate the impact of these variations. Let’s say we apply “Stylistic Set 1” to the word “quick,” resulting in a more condensed and geometric interpretation of those letters.
Then, we activate ligatures, subtly altering the connection between the ‘fi’ in “fox,” giving it a smoother, more refined appearance. Finally, we apply small caps to “The lazy dog,” creating a sense of hierarchy and visual distinction. The visual result would be a text block where specific words stand out, adding subtle emphasis and visual interest.The visual impact of using font variations is significant.
It allows for a more nuanced approach to typography, moving beyond simple bold or italic choices. By carefully selecting and applying these features, designers can achieve greater visual harmony, create stronger visual hierarchies, and inject personality into their work. Consider a logo design: using a swash on a specific letter could add a touch of elegance and flair, while employing stylistic sets might allow for a more modern or classic interpretation of the brand’s name.
In a poster design, using ligatures can improve readability while adding subtle sophistication. In a book layout, employing small caps for chapter titles can create a sense of order and distinction. The possibilities are vast and are only limited by the features of the chosen font and the designer’s creativity.
End of Discussion
So there you have it – a comprehensive guide to importing fonts into Illustrator! From understanding file formats to troubleshooting tricky issues, we’ve covered it all. Remember, the key is to choose the import method that best suits your workflow and to stay organized. Happy designing, and may your fonts always be perfectly crisp and clear!
Clarifying Questions
What if Illustrator doesn’t recognize my font file?
Try converting it to a different format (OTF to TTF or vice versa). If that doesn’t work, the font file itself might be corrupted – try finding an alternative version online.
How do I remove a font from Illustrator’s font list?
You can’t directly remove fonts from within Illustrator. You need to remove them from your system’s font library. The location varies depending on your operating system (Windows or macOS).
Can I import font files directly from a zip archive?
No, you need to extract the font files (.otf or .ttf) from the zip archive before importing them into Illustrator.
What’s the difference between embedding and linking fonts?
Embedding embeds the font directly into your Illustrator file, ensuring consistent appearance across different computers. Linking uses the font from your system, making the file size smaller but potentially causing display issues on systems lacking the font.