Gen Z Purple Millennial Pink A Color Story
Gen Z purple millennial pink: These two shades, seemingly disparate yet strangely intertwined, tell a fascinating story about generational aesthetics and marketing savvy. We’ll dive into the psychology behind these colors, exploring why they resonate so deeply with their respective generations. From the runways to social media feeds, we’ll trace their evolution and unpack their cultural significance.
Get ready for a vibrant exploration of color, identity, and the power of branding!
This isn’t just about pretty hues; it’s about understanding the subtle (and sometimes not-so-subtle) ways color influences our perception and shapes trends. We’ll look at how marketers use these colors to connect with specific demographics, and how these colors reflect the values and aspirations of Gen Z and Millennials. Prepare to see these colors in a whole new light!
Color Psychology and Generational Associations
Purple and millennial pink, while seemingly disparate, hold significant sway in the marketing and aesthetic landscapes of Gen Z and Millennials. Understanding the psychological impact of these colors, and how they resonate with each generation, is crucial for effective communication and brand building. This exploration delves into the color psychology behind these hues and their connection to generational values.
Psychological Impact of Purple and Millennial Pink
Purple, a blend of red and blue, often evokes feelings of royalty, luxury, and creativity. Its association with imagination and mystery can appeal to a younger audience, while its regal connotations can also resonate with older demographics seeking sophistication. Millennial pink, a softer, muted rose, conversely projects a sense of nostalgia, gentleness, and calm. Its pastel nature is often perceived as comforting and approachable, aligning well with a desire for authenticity and relatability.
The contrasting intensity between these colors reflects the differing personalities and priorities of Gen Z and Millennials.
Comparison of Emotional Responses to Purple and Millennial Pink
While both colors hold positive connotations, the emotional responses they elicit differ significantly. Purple’s intensity can be energizing and even slightly overwhelming, whereas millennial pink’s muted tone fosters a sense of peace and relaxation. Purple often suggests innovation and boldness, reflecting a forward-thinking approach, while millennial pink often embodies a sense of familiarity and comfort, aligning with a desire for connection and community.
These contrasting qualities directly influence their use in marketing and design.
Reflection of Generational Values and Aesthetics
Purple’s vibrancy and multifaceted nature align well with Gen Z’s embrace of individuality, self-expression, and a willingness to experiment with diverse styles. Its association with technology and innovation also makes it a fitting choice for brands targeting this tech-savvy generation. Millennial pink, with its softer, more nostalgic feel, reflects the values of Millennials, who often prioritize authenticity, community, and a sense of shared experience.
Its association with simpler times and handcrafted aesthetics speaks to a desire for comfort and connection.
Marketing Campaigns: Gen Z vs. Millennials
The following table illustrates how purple and millennial pink are utilized in marketing campaigns targeting Gen Z and Millennials:
| Color | Gen Z Marketing | Millennial Marketing | Example Campaign Style |
|---|---|---|---|
| Purple | Bold, vibrant imagery; futuristic designs; emphasis on individuality and self-expression | Subtle use; accents within a more neutral palette; focus on luxury and sophistication | Gen Z: Tech product launch with neon purple accents; Millennials: High-end skincare line with deep purple packaging |
| Millennial Pink | Used sparingly as a contrasting accent; often paired with bolder colors; maintains a sense of irony or subversion | Dominant color; used to create a feeling of warmth, comfort, and nostalgia; often seen in lifestyle brands | Gen Z: A streetwear brand using millennial pink as a small detail on a predominantly black clothing item; Millennials: A home goods brand using millennial pink extensively in their product line and marketing materials. |
Evolution of Color Trends
Source: freepik.com
The shifting tides of popular color palettes are fascinating reflections of societal changes, technological advancements, and evolving aesthetic preferences. Purple and millennial pink, while seemingly disparate, offer compelling case studies in how colors rise to prominence, become cultural touchstones, and ultimately, evolve or fade from the forefront of fashion and design. Their journeys reveal much about the interplay between color psychology and generational identity.
Purple and millennial pink’s historical context is rich and varied. While purple has historically held a place of power and luxury, often associated with royalty and spirituality, its use in fashion and design has fluctuated throughout history. Millennial pink, on the other hand, represents a more recent phenomenon, its emergence deeply intertwined with the rise of social media and specific generational aesthetics.
Tracing these color trends reveals intriguing insights into the cultural forces shaping our visual landscapes.
Millennial Pink’s Emergence and Evolution
Millennial pink, a muted, dusty rose shade, wasn’t a sudden invention but rather a gradual evolution of pink’s presence in design. Its rise to prominence in the early 2010s can be attributed to a confluence of factors. The color’s association with a sense of calm, understated elegance, and a gentle femininity resonated with the millennial generation, particularly in contrast to the brighter, bolder colors that preceded it.
Its widespread adoption by brands across various industries, from fashion and home décor to technology and food and beverage, further solidified its status as a defining color of the era. However, its popularity eventually waned, as trends are wont to do, replaced by other shades and styles. This shift highlights the cyclical nature of color trends and the ephemeral nature of certain aesthetic preferences.
Factors Contributing to Gen Z’s Embrace of Purple
Gen Z’s affinity for purple is a distinct departure from the muted tones favored by millennials. Purple’s resurgence is multifaceted, influenced by a renewed appreciation for bold, expressive colors and a growing interest in individuality and self-expression. Its association with creativity, imagination, and mystery resonates deeply with Gen Z’s values and aesthetics. Furthermore, purple’s versatile nature, capable of conveying both luxury and rebellion, allows for a wide range of interpretations and stylistic applications.
The rise of social media platforms, particularly visual ones like Instagram and TikTok, has also played a crucial role in amplifying purple’s visibility and influencing its adoption.
Examples of Purple and Millennial Pink Across Industries and Eras
The use of purple and millennial pink can be seen across various industries and eras. Historically, purple’s association with royalty is evident in paintings depicting monarchs and aristocratic figures adorned in purple robes and garments. In the 20th century, purple experienced a revival in the 1970s and 80s, appearing in everything from Prince’s iconic stage attire to the vibrant hues of disco fashion.
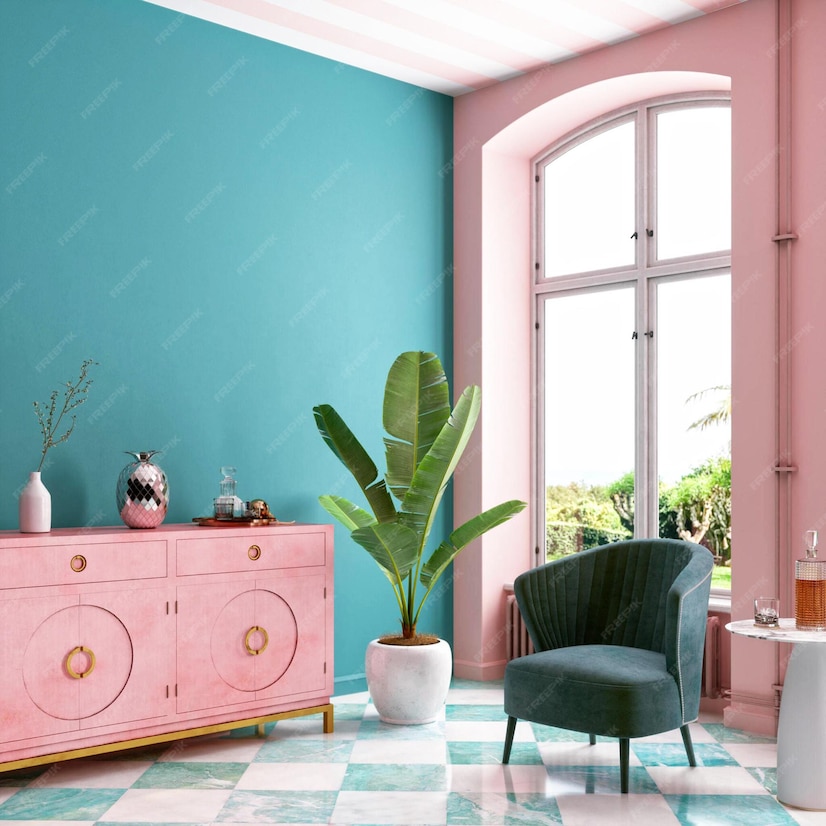
Millennial pink, in contrast, is a more recent phenomenon, largely observed in the 2010s, with brands like Glossier prominently featuring the shade in their packaging and marketing. Its prevalence in social media aesthetics during this period cemented its status as a hallmark of the millennial generation. In the realm of interior design, millennial pink found its way into minimalist living spaces, while purple’s contemporary use often appears in bolder, more maximalist settings.
The contrast between these two colors’ usage demonstrates the evolving relationship between color, design, and generational identity.
Marketing and Branding Strategies: Gen Z Purple Millennial Pink
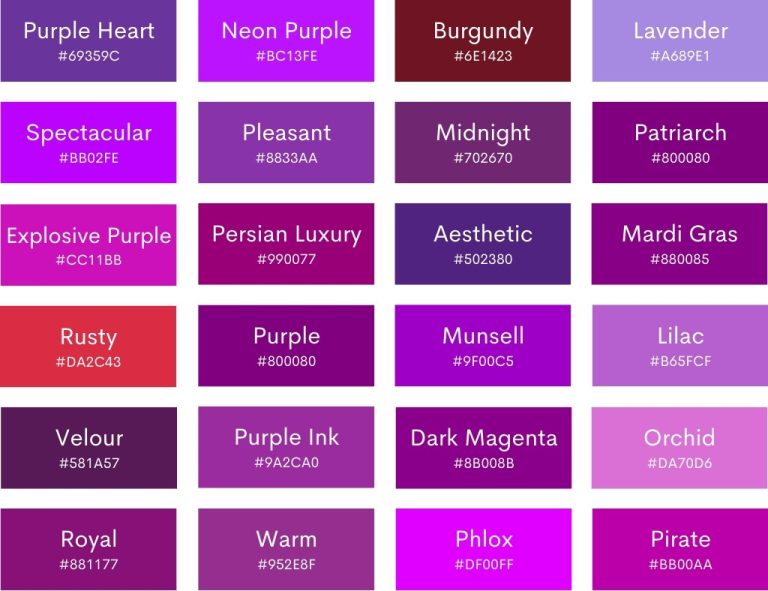
Source: thecolorsmeaning.com
Purple and millennial pink, while seemingly disparate, offer a potent combination for marketers seeking to connect with specific demographics. Their strategic deployment in branding and packaging can significantly impact consumer perception and purchasing decisions. Understanding the nuances of each color and their combined effect is key to successful marketing campaigns.
Brands leverage the unique associations of purple and millennial pink to target distinct yet overlapping consumer segments. Millennial pink, with its associations of gentleness, nostalgia, and femininity, often appeals to younger women and those seeking a sense of comfort and approachability. Purple, on the other hand, carries connotations of luxury, creativity, and mystery, appealing to a broader range but often resonating strongly with Gen Z and those seeking individuality and self-expression.
The combined use can create a brand image that is both approachable and sophisticated, playful yet authoritative.
Effectiveness of Purple and Millennial Pink in Packaging and Visual Merchandising
The strategic use of purple and millennial pink in packaging and visual merchandising is crucial for creating a cohesive brand identity. Millennial pink can soften the sometimes-overpowering intensity of purple, creating a balanced and aesthetically pleasing visual experience. For instance, a product package might feature a purple base with millennial pink accents, highlighting key information or design elements. In visual merchandising, these colors can be used to create specific zones within a store, directing attention to particular products or creating a particular mood.
A clothing store, for example, might use millennial pink to highlight a new spring collection, while using purple to accentuate luxury items or create a more sophisticated atmosphere. The effectiveness is rooted in the colors’ ability to evoke specific emotions and associations, guiding consumer behavior and enhancing the overall shopping experience.
Examples of Successful Branding Campaigns
Several successful brands have effectively integrated purple and millennial pink into their branding. While a direct combination of both is less common, many successfully utilize one or the other depending on their target audience and brand message. For example, Glossier, known for its minimalist aesthetic and focus on inclusivity, heavily features millennial pink in its packaging and marketing materials, creating a sense of approachability and gentle self-care.
Conversely, brands like Lush Cosmetics, known for their unique and creative products, often utilize purple in their packaging to convey a sense of mystery and individuality. While not directly using both colors simultaneously, these examples demonstrate the power of each color independently to create a strong and memorable brand identity.
Hypothetical Marketing Campaign: “Cosmic Bloom”
This hypothetical campaign targets young adults (18-25) interested in self-care, sustainability, and unique experiences. The brand, “Cosmic Bloom,” would be a line of ethically sourced bath and body products. The campaign would leverage both purple and millennial pink to represent the duality of the brand: the calming, nurturing aspect (millennial pink) and the imaginative, self-expressive aspect (purple). Packaging would feature a gradient blending these two colors, with the millennial pink dominant on the front and purple subtly appearing on the sides and bottom.
Marketing materials would use imagery depicting celestial bodies and blooming flowers, further reinforcing the “Cosmic Bloom” theme. The campaign’s tagline would be: “Unwind your mind, unleash your soul,” reflecting the combination of relaxation and self-discovery the brand offers. The use of influencer marketing, particularly on platforms like TikTok and Instagram, would be central to reaching the target demographic.
The visual consistency and thematic coherence of the campaign would be crucial in creating a memorable and engaging brand experience.
Social Media and Visual Culture
The pervasive influence of color in shaping online aesthetics is undeniable. Millennial pink and purple, in particular, have transcended simple color choices to become significant markers of online identity and brand strategy, reflecting broader generational trends and visual culture shifts on platforms like Instagram, TikTok, and Pinterest. Their use isn’t arbitrary; it’s a carefully calculated approach to visual communication that directly impacts user engagement and brand perception.The strategic deployment of millennial pink and purple on social media platforms speaks volumes about the current visual landscape.
These colors, often associated with nostalgia, femininity, and a sense of playful sophistication, are skillfully employed by influencers and brands to create cohesive and memorable online identities. This section will delve into specific examples of how these colors are used to achieve specific marketing goals.
Influencer Brand Identity and Color Usage
Influencers frequently leverage millennial pink and purple to cultivate specific brand aesthetics. Consider, for example, the prevalence of these colors in the backgrounds of lifestyle influencer photos on Instagram. The soft, muted tones of millennial pink often create a calming, approachable atmosphere, fostering a sense of connection with their audience. Conversely, the use of purple, depending on its shade, can convey a more sophisticated, edgy, or even mystical image, depending on the influencer’s desired persona.
A beauty influencer might use a lavender background to showcase makeup tutorials, while a fashion influencer might use a deeper purple to highlight bolder clothing choices. This careful selection aligns their visual identity with their content and target audience.
Examples of Visual Content Across Social Media Platforms
The strategic integration of millennial pink and purple extends across various social media platforms.
- Instagram: Imagine a feed featuring pastel pink and lavender backgrounds for product shots, interspersed with lifestyle photos featuring similarly toned clothing and accessories. This creates a cohesive, visually appealing feed that reinforces the brand’s identity and enhances user engagement. The use of Instagram Stories with pink and purple filters further solidifies this brand aesthetic.
- TikTok: Think of trending dance videos utilizing filters that shift between shades of millennial pink and purple, creating a dynamic and eye-catching visual experience. The use of these colors in transition effects adds another layer of visual interest, making the video more memorable. Similarly, many aesthetically pleasing “aesthetic” videos incorporate these colors heavily.
- Pinterest: Pinterest boards dedicated to home decor, fashion, or beauty frequently feature a dominant use of millennial pink and purple in the images pinned. The colors contribute to the overall mood board aesthetic, creating a cohesive and visually pleasing collection that resonates with users searching for similar styles and inspirations. The colors act as visual cues, guiding users towards content aligning with their interests.
Impact on User Engagement and Brand Perception
The strategic use of millennial pink and purple significantly influences user engagement and brand perception. These colors evoke specific emotions and associations, impacting how users interact with the content. Millennial pink, with its gentle and approachable nature, often encourages a sense of comfort and trust, increasing the likelihood of engagement. Purple, with its association with luxury, creativity, and mystery, can attract a more discerning audience and build a perception of high quality and sophistication.
Ultimately, the consistent use of these colors helps to build brand recognition and foster a strong connection with the target audience, leading to increased brand loyalty and positive word-of-mouth marketing.
Cultural Significance and Subcultural Adoption

Source: bigcommerce.com
Purple and millennial pink, while seemingly disparate in their origins, have both carved significant niches within various subcultures, demonstrating the fluidity of color symbolism and its capacity to reflect evolving identities. Their adoption isn’t uniform; meaning and significance shift depending on the specific group and the historical context. This exploration will delve into the unique ways these colors express belonging and identity within specific communities.
Subcultures Prominently Featuring Purple and/or Millennial Pink
The association of purple and millennial pink with specific subcultures is often tied to broader aesthetic movements and online trends. For instance, the pastel goth subculture, known for its blend of dark and light aesthetics, frequently incorporates millennial pink alongside black, dark purple, and other muted tones. Similarly, certain online communities centered around specific interests – such as vintage fashion or specific anime fandoms – might adopt these colors as visual shorthand for shared aesthetics and interests.
Gen Z purple and millennial pink – such vibrant, contrasting aesthetics! These colours really pop in video, which is why I’ve been experimenting with them in my latest YouTube uploads. To learn more about making your YouTube videos shine, check out this awesome guide on getting it on with YouTube ; it’s seriously helped me level up my editing.
Then, I’ll be back to playing with more Gen Z purple and millennial pink combinations for my next video!
These aren’t rigid categories, however; individual interpretations and creative expressions within these communities lead to a wide range of stylistic choices.
Comparative Analysis of Color Symbolism Across Cultures
While the West generally associates purple with royalty and luxury (a legacy stretching back centuries), and millennial pink with a softer, more feminine aesthetic, these associations are not universal. In some East Asian cultures, purple can be associated with mourning or death, a stark contrast to its Western connotations. Millennial pink, while globally associated with a certain kind of youthful femininity, can still be interpreted differently based on the context of its use – a pastel shade in a streetwear context might signal irony or a playful subversion of traditional gender roles.
The fluidity of meaning underscores the importance of considering cultural context when analyzing color symbolism.
The Role of Purple and Millennial Pink in Expressing Identity and Belonging
These colors act as visual cues, facilitating a sense of shared identity and belonging within online and offline communities. For example, the use of millennial pink in certain online spaces might signal a shared appreciation for a specific aesthetic or a particular brand. Similarly, the incorporation of purple in gothic or alternative fashion subcultures can act as a visual marker of affiliation and shared style preferences.
The choice of color becomes a form of visual communication, instantly conveying shared values and interests. This visual language transcends geographical boundaries, connecting individuals globally through shared aesthetics.
Timeline of Color Adoption and Evolution Within Subcultures, Gen z purple millennial pink
The adoption of these colors within subcultures has not been a linear process. It’s more accurate to describe it as a series of overlapping trends and influences.
| Period | Color | Subculture/Trend | Key Characteristics |
|---|---|---|---|
| Late 2000s – Early 2010s | Millennial Pink | Early adopters on Tumblr and other online platforms | Associated with a softer, more feminine aesthetic; early stages of the color’s rise to mainstream popularity. |
| Mid 2010s | Purple & Millennial Pink | Pastel Goth | Combination of dark and pastel elements; exploration of contrast and subversion of traditional gothic aesthetics. |
| Late 2010s – Present | Millennial Pink & Variations | Broader adoption across various online communities and brands | Increased commercialization; diverse interpretations and applications; evolution into related pastel shades. |
| Present | Purple (various shades) | Diverse online communities & niche fashion subcultures | Continued association with alternative and gothic aesthetics; renewed interest in darker, more saturated purples. |
Wrap-Up
So, there you have it – a journey through the captivating world of Gen Z purple and millennial pink. From their individual psychological impacts to their combined power in marketing and social media, these colors have woven themselves into the fabric of modern visual culture. Ultimately, their story reflects a broader narrative about generational identity and the ever-evolving language of visual communication.
And who knows what vibrant hues will capture the zeitgeist next?
General Inquiries
What’s the difference between millennial pink and rose gold?
Millennial pink is a softer, more muted pink, while rose gold has a metallic, warmer tone with hints of gold.
Why is purple associated with Gen Z?
Purple is often seen as a bold, creative, and expressive color, aligning with Gen Z’s individuality and embrace of non-conformity.
Are these color associations universal?
No, color associations can vary across cultures and individual experiences. These are general trends observed in Western cultures.
Can these colors be used together effectively?
Yes, the contrast between the softer millennial pink and the bolder purple can create a visually interesting and memorable combination, especially when targeting a broad demographic.