Best Film Dust Textures A Guide
Best film dust textures aren’t just about adding grit; they’re about evoking mood, enhancing realism, and crafting a specific visual style. Think of the hazy glow of a sun-drenched memory, the gritty realism of a noir detective scene, or the subtle imperfections that whisper of a bygone era of film. This post dives deep into the world of film dust textures, exploring everything from identifying the “best” to mastering their application in your own projects.
We’ll cover how to define quality, explore different types of dust and their aesthetic impacts, discuss sources and creation methods (both analog and digital), and delve into the technical aspects of integration within your video editing workflow. We’ll also look at the artistic considerations – how dust can shape the mood and atmosphere of a scene – and showcase examples from films that use dust effectively.
Get ready to dust off your editing skills!
Defining “Best” Film Dust Textures
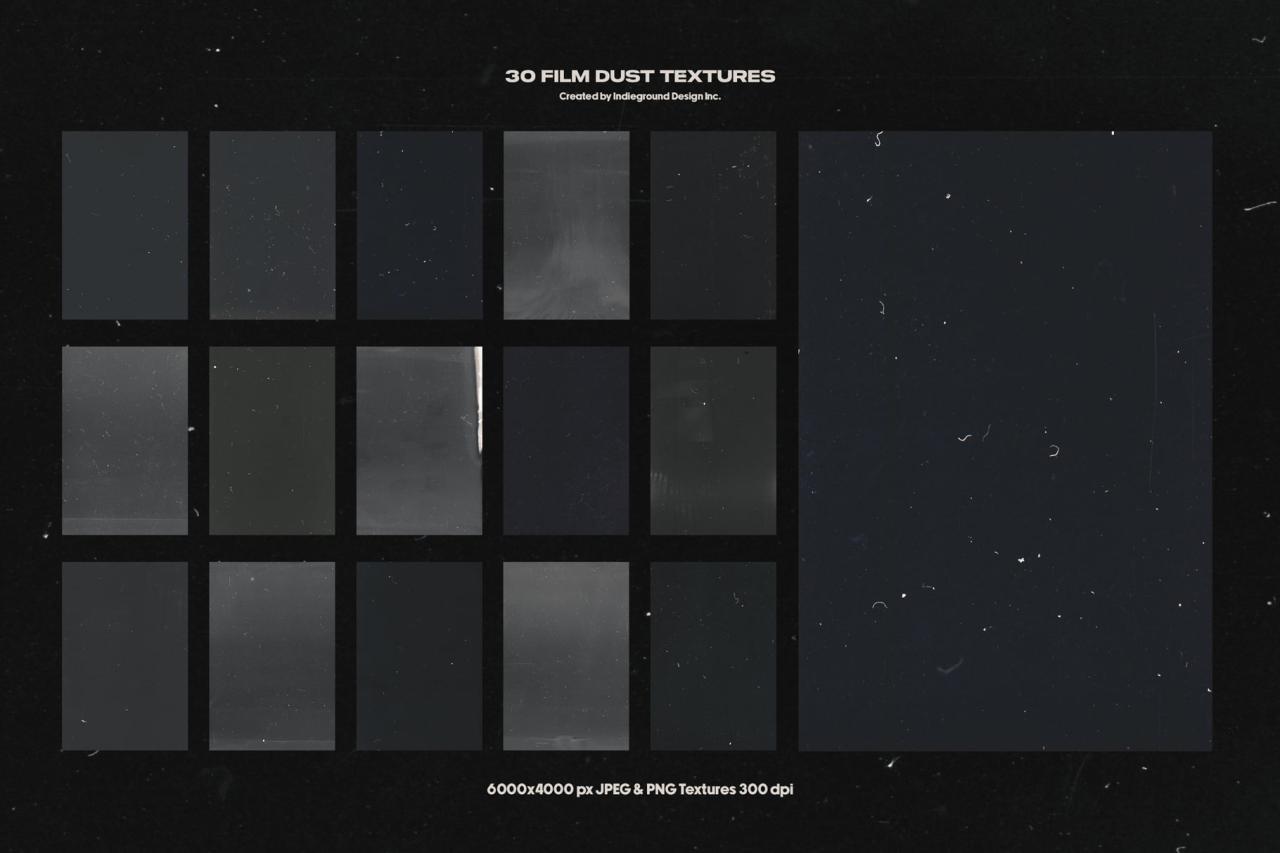
Source: indieground.net
Defining what constitutes the “best” film dust textures is subjective, depending heavily on the desired aesthetic and the overall style of the film being emulated or created. However, several characteristics contribute to high-quality textures that convincingly replicate the look of film grain and imperfections. These textures aren’t simply random specks; they contribute to the overall mood and feel of a project.High-quality film dust textures are characterized by their realism and versatility.
Realism involves accurately representing the size, shape, distribution, and opacity of dust particles found on actual film stock. Versatility refers to the ability of the texture to blend seamlessly into various scenes and lighting conditions without appearing overly artificial or distracting. The best textures offer a subtle, organic enhancement, not a jarring visual element.
Types of Film Dust and Their Aesthetic Impact
Different types of film dust vary significantly in size, shape, and density. Larger dust particles, for example, might create more pronounced, noticeable specks, often associated with older or poorly-stored film. These larger particles might be ideal for creating a gritty, vintage feel, complementing films set in the past or aiming for a specific nostalgic effect. In contrast, smaller, more numerous particles can create a softer, more diffused effect, suitable for a wider range of styles.
The shape of the particles also plays a role; irregular shapes tend to appear more realistic than perfectly round ones. Finally, density—the number of particles per unit area—directly influences the overall “graininess” and intensity of the effect. A high-density texture will appear much more heavily dusted than a low-density one. The choice of dust type depends entirely on the desired aesthetic; a film noir might benefit from larger, more pronounced dust particles to enhance its shadowy atmosphere, while a bright, sun-drenched romance might utilize a more subtle, low-density texture.
Visual Scale Rating System for Film Dust Textures
A visual scale could effectively rate film dust textures based on realism and artistic appeal. We can imagine a two-dimensional scale, with “Realism” on the x-axis and “Artistic Appeal” on the y-axis. Each axis could range from 1 to 5, with 1 representing the lowest score and 5 representing the highest.
| Realism \ Artistic Appeal | 1 (Poor) | 2 (Fair) | 3 (Good) | 4 (Very Good) | 5 (Excellent) |
|---|---|---|---|---|---|
| 1 (Poor) | Obvious artifacts, unrealistic distribution | Slightly unrealistic distribution, noticeable repetition | Mostly realistic, minor inconsistencies | Highly realistic, subtle imperfections | Indistinguishable from real film dust |
| 2 (Fair) | Obvious artifacts, limited artistic impact | Slightly unnatural, limited artistic value | Realistic, but lacks significant artistic impact | Good realism, subtle artistic enhancement | Highly realistic, enhances the mood effectively |
| 3 (Good) | Mostly realistic, limited artistic value | Fairly realistic, moderate artistic impact | Good realism, noticeable artistic contribution | Excellent realism, significant artistic impact | Exceptional realism, strong artistic contribution |
| 4 (Very Good) | Highly realistic, minor artistic flaws | Excellent realism, good artistic impact | Near-perfect realism, enhances the mood | Exceptional realism and artistic appeal | Exceptional realism, powerfully enhances the mood |
| 5 (Excellent) | Perfect realism, strong artistic impact | Perfect realism, powerful artistic impact | Perfect realism, significantly enhances the mood | Perfect realism, transforms the aesthetic | Unmatched realism and artistic appeal |
For example, a texture with a rating of (4, 3) would indicate a highly realistic texture that contributes positively to the artistic feel, though perhaps not as dramatically as a texture with a (5,5) rating. This system provides a framework for evaluating and comparing different film dust textures based on objective and subjective criteria.
Sources and Creation of Film Dust Textures
So, you want to add that authentic, slightly gritty, film-like feel to your digital projects? Achieving that coveted “film dust” look isn’t just about slapping a texture on; it’s about understanding where it comes from and how to realistically replicate it. Let’s dive into the sources and the digital artistry behind creating convincing film dust textures.Film dust isn’t a single effect; it’s a composite of several factors originating from the physical filmmaking process.
Understanding these sources is crucial to recreating the look convincingly.
Finding the best film dust textures can be a real treasure hunt for any video editor, but sometimes you need a little extra oomph to showcase your hard work. That’s where promoting your edits comes in; I’ve found some great tips on how to do just that in this awesome guide on getting it on with youtube , which really helped me get my dust-textured videos noticed.
Back to those textures though – I’m currently experimenting with some gritty, high-resolution options to really add that authentic film feel.
Sources of Film Dust Textures
Film dust originates from various sources during the filming process. The most common culprits are the camera’s internal components, the film stock itself, and the environment. Camera lenses, due to their intricate mechanisms and exposure to the outside world, often accumulate dust particles. Film stock, being a delicate material, can also attract and trap dust during storage and handling.
Finally, the filming environment—especially in outdoor shoots—can contribute airborne dust that settles on the film. The combination of these elements creates a unique and often beautiful imperfection that defines the aesthetic of classic film.
Creating Realistic Film Dust Textures Digitally
Replicating film dust digitally requires a careful approach, balancing realism with artistic control. The process typically begins with acquiring high-resolution scans of actual film negatives exhibiting dust and scratches, or by carefully photographing dust particles on various surfaces under controlled lighting. This source material forms the basis for the digital textures.
Software and Techniques for Generating Film Dust Textures
Several software packages excel at creating and manipulating film dust textures. Adobe Photoshop, with its extensive layer blending modes and masking tools, is a popular choice. It allows for precise control over opacity, blending, and color adjustments to seamlessly integrate dust effects into footage. Other software like After Effects can be used for more dynamic effects and layering on moving footage.
Techniques range from simple overlaying of pre-made textures to complex particle simulations, depending on the desired level of realism and control. For example, using Photoshop’s brush tool with carefully selected texture images allows for fine control over the placement and density of dust particles.
Achieving Specific Dust Effects
The key to mastering digital film dust lies in understanding the nuances of different effects. Subtle dust can be achieved by using low-opacity textures with a soft brush, focusing on the corners and edges of the frame to mimic the natural settling of particles. Heavy dust requires higher opacity and potentially multiple layers of textures, perhaps with varied sizes and densities of particles, to create a more pronounced, gritty feel.
Light flares, often associated with dust, can be simulated using radial gradient tools or specialized plugins that generate realistic lens flare effects. Careful attention to color grading and overall contrast can further enhance the believability of the effects. For example, a warm, slightly desaturated color palette can accentuate the nostalgic feel of film dust.
Application and Integration of Film Dust Textures
Seamlessly integrating film dust textures into your video footage can elevate the overall aesthetic, adding a touch of nostalgic charm or gritty realism. The process involves careful consideration of several key factors, primarily focusing on compositing techniques, masking, and blending modes. Mastering these aspects will allow you to achieve a natural and convincing look, avoiding the pitfalls of overly artificial or distracting effects.
Successful integration relies heavily on compositing software like After Effects, Nuke, or even simpler tools like DaVinci Resolve. These programs provide the necessary tools for layering textures, adjusting opacity, and precisely controlling the interaction between the dust and your original footage. The key is to make the dust appear as if it’s organically part of the scene, rather than a separate, superimposed element.
Masking and Blending Modes for Film Dust Textures
Effective masking is crucial for controlling where the dust texture appears in your footage. Precise masking ensures the dust is only visible in the desired areas, preventing it from obscuring important elements of your video. Blending modes, on the other hand, determine how the dust texture interacts with the underlying footage, influencing its overall appearance and integration. Experimentation with different blending modes is key to achieving the desired aesthetic.
A Step-by-Step Guide to Applying Film Dust Textures
Let’s walk through a typical workflow using a compositing software like After Effects. This guide assumes you have already chosen your dust texture and imported it into your software.
- Import Footage and Texture: Import your video footage and the chosen film dust texture into your compositing software.
- Create a New Composition: Create a new composition with the same dimensions as your video footage.
- Layer the Texture: Place the dust texture layer above your footage layer in the timeline.
- Adjust Opacity and Scale: Begin by adjusting the opacity of the dust texture layer to control its intensity. You might also need to scale the texture to fit the dimensions of your footage.
- Apply a Mask: Use the pen tool or other masking tools to carefully mask out areas where the dust texture shouldn’t appear. This is crucial for preventing the dust from obscuring important details.
- Experiment with Blending Modes: Try different blending modes to find the best fit for your footage and desired aesthetic. Screen, Overlay, Soft Light, and Multiply are common choices. Each mode interacts with the underlying footage differently, impacting the final look of the dust.
- Refine and Adjust: Continue refining your mask and adjusting the opacity and blending mode until you achieve a natural and convincing result. You might need to add subtle motion blur or other effects to enhance realism.
Comparison of Blending Modes
The choice of blending mode significantly impacts the final look. Here’s a table comparing some common options:
| Blending Mode | Description | Effect on Dust | Best Use Case |
|---|---|---|---|
| Screen | Adds light; brightens the underlying image. | Makes dust appear lighter and more ethereal. | Subtle dust effects, brighter scenes. |
| Overlay | Blends light and dark areas differently. | Creates a more balanced look, good for mid-tone dust. | Versatile, works well in many scenarios. |
| Soft Light | Subtle lighting effect; less intense than Overlay. | Adds a gentle, diffused dust effect. | Subtle effects, preserving detail. |
| Multiply | Darkens the underlying image; good for darkening dust. | Creates a darker, more intense dust effect. | Darker scenes, more pronounced dust. |
Common Mistakes to Avoid When Adding Film Dust Textures, Best film dust textures
Avoiding common pitfalls ensures a professional and polished final product.
- Overusing the effect: Too much dust can overwhelm the footage and look unnatural. Less is often more.
- Poor masking: Sloppy masking will result in dust appearing in unwanted areas, detracting from the overall effect.
- Ignoring motion blur: Static dust often looks unrealistic. Adding motion blur can significantly enhance realism.
- Inconsistent application: Maintain consistency in the application of dust throughout the video to avoid jarring transitions.
- Using low-resolution textures: Low-resolution textures will look pixelated and detract from the overall quality.
Artistic and Technical Considerations
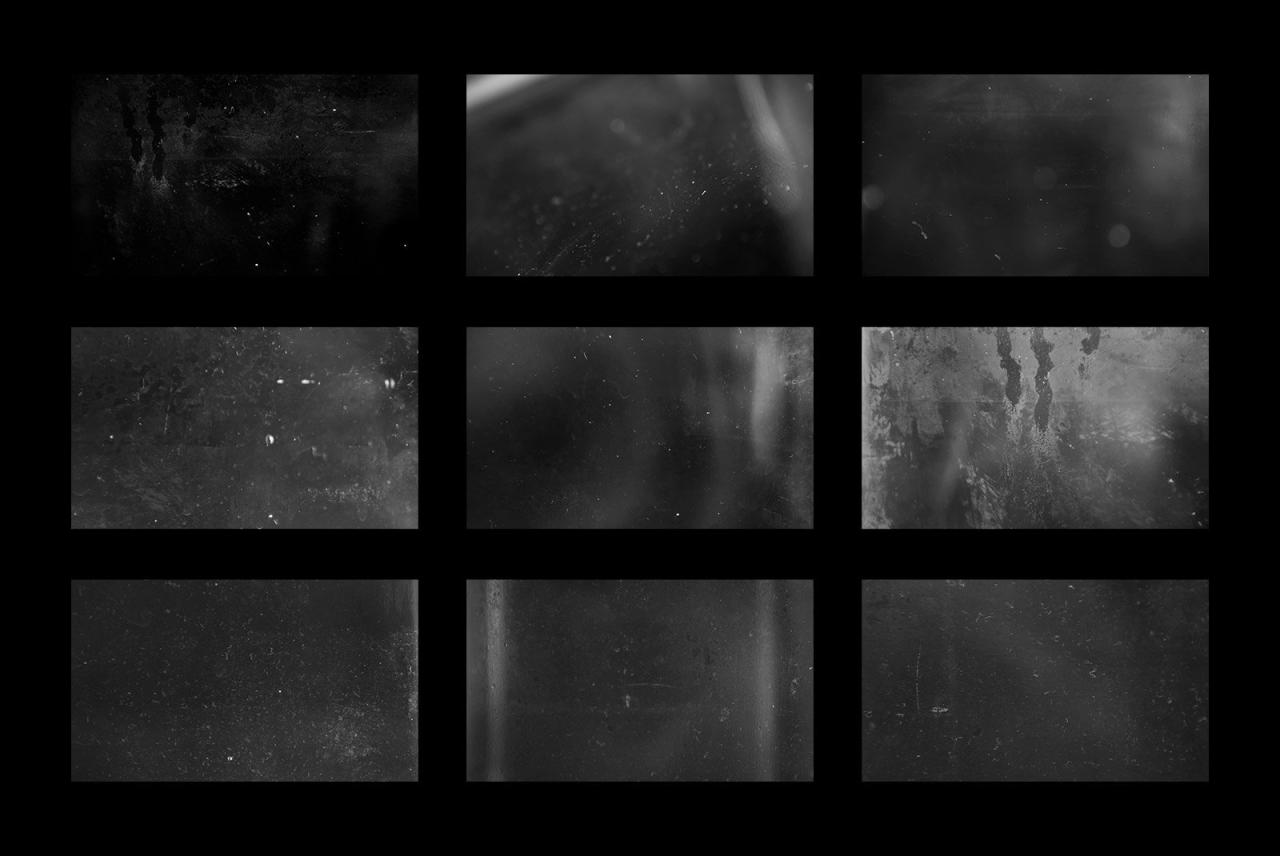
Source: supply.family
Film dust, far from being a mere imperfection, offers a powerful tool for filmmakers to manipulate mood, atmosphere, and even narrative. Its subtle presence can evoke a sense of nostalgia, decay, or even mystery, adding layers of depth and authenticity to the visual storytelling. Understanding how to harness this effect effectively is crucial for achieving a desired aesthetic and emotional impact.
The Role of Film Dust in Enhancing Mood and Atmosphere
Film dust’s impact on mood and atmosphere is surprisingly multifaceted. A light scattering of dust can suggest a hazy, dreamlike quality, perfect for romantic scenes or moments of quiet reflection. Conversely, a heavier concentration of dust, particularly with a gritty, coarse texture, can evoke feelings of decay, abandonment, or even impending doom, ideal for thriller or horror genres. The size, distribution, and color of the dust particles all contribute to the overall effect, allowing for a nuanced control over the viewer’s emotional response.
Consider, for instance, the difference between the soft, almost imperceptible dust motes in a sunlit pastoral scene versus the dense, swirling dust clouds in a post-apocalyptic wasteland. The contrast is striking and speaks volumes about the power of this seemingly insignificant detail.
Film Dust in Different Genres
The application of film dust varies significantly across different film genres. In horror films, heavy, gritty dust can enhance the feeling of decay and unease, often associated with neglected settings or haunted locations. Think of the dimly lit, dusty corridors in classic horror films, where the dust particles seem to hang heavy in the air, amplifying the sense of dread.
Romance films, on the other hand, might employ a more subtle, almost ethereal dusting of particles, contributing to a hazy, romantic atmosphere. Documentaries can use film dust to enhance the sense of age and authenticity, giving a vintage feel to archival footage or historical recreations. The documentary
The Civil War* (Ken Burns, 1990), while not employing digitally added dust, achieves a similar effect through its grainy film stock, which inherently has similar visual characteristics.
Examples of Effective Film Dust Use
While specific examples of digitally added film dust are hard to pinpoint without behind-the-scenes information, we can analyze the effect in films that heavily utilize a “vintage” or “aged” look. Many films achieve a similar effect through the use of older film stock and post-production techniques that mimic the appearance of dust and scratches. For example, the gritty, almost grainy aesthetic of films likeBlade Runner 2049* (Denis Villeneuve, 2017) evokes a sense of decay and dystopia, partly through its visual texture which mirrors the appearance of dust and film grain.
The careful use of lighting and color grading further enhances this effect, creating a world that feels both visually stunning and deeply unsettling.
Visual Examples of Varying Dust Density and Distribution
Let’s imagine four visual examples to illustrate the impact of dust. Example 1: Sparse Dust, Soft Lighting: Imagine a romantic scene set in a sun-dappled forest clearing. A few, barely visible dust motes dance in the shafts of sunlight. The overall effect is one of ethereal beauty and gentle tranquility. The emotional response is calm, peaceful, and romantic.
Example 2: Moderate Dust, Diffused Lighting: A scene set in an old, abandoned library. A moderate amount of dust motes hangs in the air, illuminated by soft, diffused light. The atmosphere is one of quiet mystery and melancholy. The viewer feels a sense of longing and perhaps a hint of sadness. Example 3: Dense Dust, Harsh Lighting: A post-apocalyptic scene.
Dense clouds of dust swirl in the air, illuminated by the harsh glare of a setting sun. The overall effect is one of desolation and despair. The emotional response is one of unease, fear, and possibly hopelessness. Example 4: Concentrated Dust, Low-Key Lighting: A scene in a dimly lit, dusty attic. Dust is heavily concentrated in specific areas, such as around beams or in corners.
Low-key lighting creates shadows that emphasize the texture and density of the dust. This creates a sense of claustrophobia and suspense. The emotional response is one of unease, mystery, and perhaps a feeling of being watched.
Resources and Further Exploration: Best Film Dust Textures
So, you’re hooked on the magic of film dust textures and ready to dive deeper? Excellent! This section provides a curated selection of resources to help you master this captivating post-production technique, from finding the perfect assets to applying them with ease. We’ll explore both free and paid options, offering practical advice and a simple step-by-step guide to creating your own dust overlay.
The world of film dust textures is surprisingly vast, encompassing various sources, qualities, and applications. Navigating this landscape effectively requires knowledge of where to find the best assets and the tools to utilize them. This section aims to provide you with a comprehensive starting point for your journey into film grain mastery.
A Curated List of Websites, Tutorials, and Resources
Finding high-quality film dust textures and learning how to effectively use them can sometimes feel like searching for a needle in a haystack. The following list provides a selection of reputable websites, tutorials, and other resources that offer valuable information and assets for creating stunning film looks.
- Creative Market: A popular marketplace offering a wide variety of high-quality, professionally-created film grain and dust textures, often with commercial licenses.
- Shutterstock/iStock/Adobe Stock: These stock photo sites offer a vast library of textures, including many options for film grain and dust effects, with varying licensing options.
- YouTube Tutorials: Numerous YouTube channels dedicated to filmmaking and post-production offer tutorials on creating and applying film dust textures using various software like Photoshop, After Effects, and DaVinci Resolve.
- Blogs and Articles: Websites and blogs focusing on filmmaking, photography, and post-production often feature articles and tutorials on the topic of film grain and dust effects, offering valuable insights and techniques.
Free and Paid Resources for Film Dust Textures
The availability of film dust textures spans a spectrum from completely free to professionally-created paid assets. Understanding the differences and where to find them is key to efficient workflow.
- Free Resources: Websites like DeviantArt, Flickr (under Creative Commons licenses), and some smaller online communities often offer free film grain and dust textures. However, always carefully check the license to ensure you’re using them legally.
- Paid Resources: Platforms like Creative Market, Etsy, and the aforementioned stock photo sites provide a wider range of high-resolution, professionally-created textures, often with extended licensing options for commercial use.
Creating a Simple Dust Overlay
This step-by-step guide demonstrates how to create a simple dust overlay using a readily available resource and basic image editing software like Photoshop. This is a fundamental technique that can be adapted to various software and image types.
- Acquire a Dust Texture: Find a suitable dust texture image (either free or paid). Aim for a high-resolution image for best results.
- Open Your Image and Texture: Open both your main image and the dust texture in your image editing software.
- Adjust Blending Mode: Drag and drop the dust texture layer onto your main image. Experiment with different blending modes (like Screen, Overlay, Soft Light) to find the most suitable effect. Screen mode often works well for adding a subtle, light dust effect.
- Adjust Opacity and Layer Mask: Adjust the opacity of the dust layer to control the intensity of the effect. Use a layer mask to selectively apply the dust texture to specific areas of your image, preventing it from affecting unwanted regions.
- Refine and Save: Fine-tune the dust effect by adjusting the levels, curves, or other adjustments to achieve the desired look. Save your image in a suitable format.
Key Terms and Concepts
Understanding the terminology associated with film dust textures and their application is crucial for effective communication and efficient workflow. This list defines some key terms used in this context.
- Film Grain: The inherent texture in film photography, often appearing as small, randomly distributed particles of light and dark.
- Dust and Scratches: Imperfections that can appear on film negatives or prints, adding a characteristic vintage look.
- Blending Modes: Settings in image editing software that determine how layers interact, influencing the final appearance of the composite image.
- Opacity: The degree of transparency of a layer, controlling the visibility of the underlying layers.
- Layer Mask: A tool in image editing software allowing for selective application of effects or adjustments to specific areas of a layer.
- Resolution: The number of pixels in an image, affecting its sharpness and detail. Higher resolution generally leads to better results.
Conclusive Thoughts

Source: unblast.com
Mastering film dust textures is more than just adding a filter; it’s about understanding their nuances and wielding them as a powerful artistic tool. From subtle enhancements to dramatic effects, the right dust can transform your footage. By understanding the sources, creation techniques, and application methods, you can elevate your projects from ordinary to extraordinary. So, go forth and experiment – the perfect dust effect awaits!
FAQ Corner
What’s the difference between film dust and film grain?
Film grain is the inherent texture of the film stock itself, while film dust refers to particles that appear on the film due to various factors like the environment or camera equipment. Grain is consistent, dust is random.
Can I create film dust textures myself?
Absolutely! You can create them digitally using software like Photoshop or After Effects, or even by photographing dust particles yourself. Many free resources are also available online.
Are there any copyright issues with using free film dust textures?
Always check the license of any free resource before using it in a commercial project. Some may require attribution, while others might have more restrictive terms.
How do I avoid overusing film dust textures?
Less is often more. Start with subtle amounts and gradually increase until you achieve the desired effect. Too much dust can look unnatural and detract from the overall quality of your work.