5 Easy WordPress Management Hacks
5 Easy WordPress Management Hacks: Let’s face it, managing a WordPress site can feel overwhelming sometimes. Between plugins, media, security, backups, and themes, it’s easy to get lost in the weeds. But what if I told you there are some simple, surprisingly effective hacks that can drastically improve your workflow and site performance? This post dives into five easy-to-implement strategies that will make your WordPress life significantly easier.
We’ll cover everything from streamlining your plugin collection and optimizing your media library to bolstering your site’s security and creating a robust backup strategy. We’ll even explore the power of WordPress themes and how to use them effectively. Get ready to reclaim your time and energy – and maybe even enjoy managing your WordPress site a little more!
Streamlining WordPress Plugin Management
Keeping your WordPress website running smoothly and efficiently involves careful management of its plugins. Too many plugins can significantly slow down your site’s loading speed, impacting user experience and potentially harming your search engine rankings. This section focuses on practical strategies for optimizing your plugin collection.
A streamlined plugin setup is crucial for website performance and security. By carefully selecting and maintaining your plugins, you can ensure a faster, more secure, and better-performing WordPress site.
Deactivating Unnecessary Plugins
Regularly reviewing your active plugins is vital for maintaining optimal website performance. Many plugins, once installed, may become redundant or no longer serve a purpose. Deactivating these unnecessary plugins can significantly improve your site’s speed and efficiency.
- Access the Plugins Page: Log in to your WordPress dashboard and navigate to Plugins > Installed Plugins.
- Identify Unnecessary Plugins: Carefully review each plugin. Consider its function and whether it’s still essential for your website’s current needs. Ask yourself: Has this plugin been used recently? Is its functionality provided by another plugin or theme feature? Is it contributing to slow loading times?
- Deactivate Plugins: Select the checkbox next to each plugin you wish to deactivate. Then, click the “Deactivate” button at the top of the page. Remember to only deactivate plugins, not delete them, unless you are absolutely certain you will never need them again.
- Monitor Performance: After deactivating plugins, use a website speed testing tool (like Google PageSpeed Insights or GTmetrix) to assess the impact on your website’s loading time. This helps you gauge the effectiveness of your plugin streamlining efforts.
Comparing Popular Caching Plugins
Caching plugins significantly improve website performance by storing static content and delivering it faster to users. Choosing the right caching plugin depends on your specific needs and website setup. Here’s a comparison of five popular options:
| Plugin Name | Features | Performance Improvement (Estimate) | Compatibility |
|---|---|---|---|
| WP Super Cache | Multiple caching methods (disk, memory), easy configuration, mobile caching | Up to 50% improvement | Most themes and plugins |
| W3 Total Cache | Extensive caching options, CDN integration, database caching, minification | Up to 70% improvement (with proper configuration) | Generally good, but may require some troubleshooting with certain setups |
| LiteSpeed Cache | Fast and efficient caching, built-in features for LiteSpeed web servers | Up to 80% improvement (with LiteSpeed web server) | Best with LiteSpeed web servers; limited functionality with others |
| Autoptimize | Focuses on optimizing JavaScript and CSS files, code minification | Significant improvement in page load times, especially for sites with many scripts | Generally good, but may need configuration adjustments depending on themes and plugins |
| Perfmatters | Advanced performance optimization, granular control over what is cached and loaded | Variable, depends on the specific configuration and site; can significantly improve load times | Generally good, though some settings may need tweaking for specific themes and plugins |
Note: Performance improvement percentages are estimates and can vary based on website configuration and content.
Managing Plugin Updates
Keeping your plugins updated is crucial for security and functionality. Outdated plugins can be vulnerable to exploits and may break compatibility with newer WordPress versions or other plugins. A well-defined update strategy is essential.
Prioritize updates based on a combination of security vulnerability reports and impact on functionality. Plugins with known security flaws should be updated immediately. Those that are critical to your website’s functionality (e.g., e-commerce plugins, contact form plugins) should also be given high priority. Regularly check the WordPress plugin repository for security advisories and update notices.
Always back up your website before performing any major updates, including plugin updates. This precaution ensures that you can easily restore your website if something goes wrong during the update process. Consider using a staging environment to test updates before applying them to your live site.
Optimizing WordPress Media Library: 5 Easy WordPress Management Hacks
Source: wpeverestbackup.com
A cluttered media library can significantly slow down your WordPress site and make content management a nightmare. Efficiently organizing and optimizing your media files is crucial for both performance and ease of use. This section will cover practical strategies to streamline your media library and improve your WordPress experience.
Organizing Media Files with Folders and Tags
Effective organization is key to quickly finding the right image or video. Using a consistent system of folders and tags allows for efficient retrieval and reduces the time spent searching through your media library. Think of it as creating a well-organized filing cabinet for your digital assets.
- Create descriptive folder structures: Instead of dumping all your images into one folder, create folders based on project, year, or content type. For example, you might have folders like “2024 Blog Posts,” “Product Images,” or “Client Projects.”
- Utilize WordPress tags effectively: Tags provide another layer of organization, allowing you to categorize your media based on s. Use a consistent tagging system to ensure easy searching and retrieval. For example, you could tag images with s like “product-shot,” “landscape,” or “event-photography.”
- Combine folders and tags for a robust system: The most effective approach often involves a combination of folders and tags. Folders provide a high-level structure, while tags enable finer-grained categorization. This dual approach ensures efficient organization and retrieval of your media assets.
Compressing Images Without Significant Quality Loss
Large image files are a major contributor to slow page load times. Compressing images reduces their file size without drastically impacting visual quality, leading to a faster website and improved user experience. Several methods achieve this.
There are several techniques for compressing images. Many image editing programs (like Photoshop or GIMP) offer built-in compression options. Alternatively, you can use online tools or plugins that specialize in lossy or lossless compression. Lossy compression reduces file size more aggressively but can result in some minor quality loss, whereas lossless compression maintains the original quality but reduces the file size less dramatically.
Finding the right balance depends on your needs and tolerance for quality reduction.
Removing Unused or Orphaned Media Files
Over time, your WordPress media library can accumulate unused or orphaned files – images and videos that are no longer linked to any posts or pages. These files take up valuable disk space and contribute to a less efficient site. Several tools and techniques can help you identify and remove these unnecessary files.
- Manually review your media library: This is the most basic approach, requiring you to go through your media library and delete files that appear unused. This method is time-consuming but effective for smaller libraries.
- Use a plugin: Several WordPress plugins are designed to scan your media library and identify orphaned files. These plugins often provide a visual representation of unused media, making it easy to select and delete them in bulk. Research and choose a reputable plugin with positive user reviews before installing it.
- Utilize database queries (advanced users): For those comfortable with SQL, you can use database queries to identify and remove orphaned media. This approach requires a deep understanding of your WordPress database structure and carries a risk of data loss if not executed correctly. Always back up your database before attempting this method.
Enhancing WordPress Security
Source: gracethemes.com
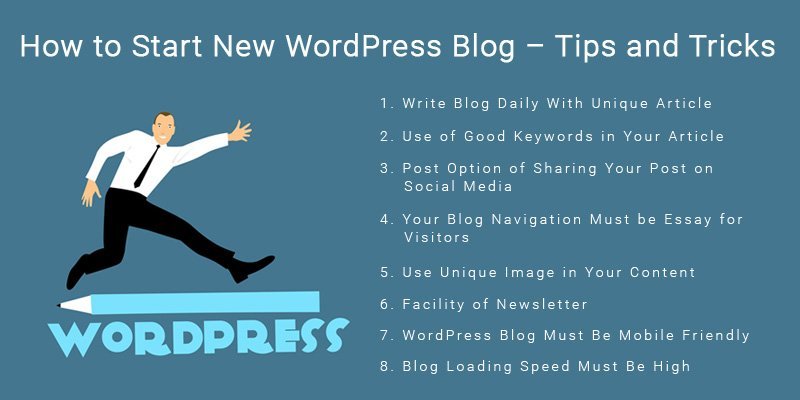
A robust security strategy is paramount for any WordPress website. Neglecting security can lead to data breaches, website defacement, and significant financial losses. This section will Artikel practical steps to bolster your WordPress site’s defenses, focusing on user account security, essential security plugins, and the critical importance of regular updates.
Implementing strong passwords and enabling two-factor authentication are foundational security measures. These simple steps significantly reduce the risk of unauthorized access, even if your website experiences a security breach elsewhere.
Strong Passwords and Two-Factor Authentication
Strong passwords are the first line of defense against unauthorized access. They should be long, complex, and unique to each account. Avoid using easily guessable information like birthdays or pet names. A password manager can help you generate and securely store strong, unique passwords for all your online accounts. Two-factor authentication (2FA) adds an extra layer of security by requiring a second verification method, such as a code sent to your phone or email, in addition to your password.
Enabling 2FA on your WordPress admin account is highly recommended and often available through plugins or your hosting provider’s control panel. The added complexity significantly hinders unauthorized login attempts, even if someone obtains your password.
Essential Security Plugins and Their Core Functionalities, 5 easy wordpress management hacks
Several plugins provide comprehensive security features for WordPress. Choosing the right plugin depends on your specific needs and technical expertise. However, integrating a robust security plugin is crucial.
Here’s a list of commonly used plugins and their key functionalities:
- Wordfence: Offers a firewall, malware scanner, login security enhancements, and real-time threat intelligence.
- Sucuri Security: Provides website security auditing, malware scanning, security hardening, and post-hack security assistance.
- iThemes Security (formerly Better WP Security): Offers a wide range of security features, including file change detection, database backups, and brute force protection.
It’s important to note that while these plugins provide excellent security features, they are not a replacement for regular security best practices.
Regular WordPress Core, Theme, and Plugin Updates
Regular updates are crucial for maintaining the security and stability of your WordPress website. Outdated software is vulnerable to known exploits, making your site an easy target for hackers. WordPress core updates address security vulnerabilities and introduce new features. Theme and plugin updates often include bug fixes and security patches.
To update your WordPress installation:
- Log in to your WordPress admin dashboard.
- Navigate to the “Updates” section.
- Review the available updates for WordPress core, themes, and plugins.
- Click “Update Now” to install the updates. It’s recommended to back up your website before performing major updates.
Regularly checking for updates and installing them promptly is a fundamental aspect of maintaining a secure WordPress website. This proactive approach minimizes the risk of vulnerabilities and ensures your website remains protected.
Improving WordPress Backup Strategy
Regular backups are the cornerstone of a healthy WordPress website. Without them, a corrupted file, a hacked database, or even a simple hosting error could wipe out all your hard work. A robust backup strategy ensures you can quickly restore your site to a previous, functional state, minimizing downtime and data loss. This isn’t just about peace of mind; it’s about protecting your investment and your online presence.
Choosing the right backup method and implementing a solid strategy involves understanding your needs and resources. Let’s explore different approaches and build a plan to safeguard your valuable WordPress data.
WordPress Backup Methods Compared
Several methods exist for backing up your WordPress site, each with its own advantages and disadvantages. The best choice depends on your technical skills, budget, and the criticality of your website.
| Backup Method | Pros | Cons |
|---|---|---|
| Manual Backup (Using phpMyAdmin and File Manager) | Free, good for learning the process, offers granular control. | Time-consuming, prone to errors, requires technical expertise, no automated scheduling. |
| Automated Plugin (e.g., UpdraftPlus, BackupBuddy) | Automated scheduling, easy to use, often includes offsite storage options, usually offers various features like versioning. | Requires plugin installation and maintenance, can impact performance if not configured correctly, may involve a recurring cost for premium features. |
| Hosting Provider Backups | Often included in hosting plans, convenient, sometimes automated. | Backup frequency and retention policies vary widely, less control over the backup process, may not include all necessary files or databases. |
Creating a Comprehensive Backup Strategy
A comprehensive backup strategy involves both database and file backups, scheduled regularly and stored securely offsite. Following these steps will create a robust and reliable system.
- Choose your backup method: Select a method (manual, plugin, or hosting provider) that aligns with your technical skills and budget. Consider the pros and cons Artikeld in the table above.
- Schedule regular backups: Aim for daily or at least weekly full backups. For frequently updated sites, more frequent backups might be necessary. Consider incremental backups (only changes since the last backup) to save storage space.
- Back up both your database and files: Your WordPress database contains all your posts, pages, comments, and settings. Your files include themes, plugins, images, and other media. Both are crucial for a complete restoration.
- Test your backups: Regularly restore a backup to a staging environment to verify its integrity and ensure the restoration process works correctly. This prevents unpleasant surprises during an actual emergency.
- Document your process: Keep detailed records of your backup method, schedule, and storage location. This is invaluable if you need to restore your site or hand over responsibility to someone else.
Best Practices for Offsite Backup Storage
Storing backups offsite is critical to protect against data loss from local disasters like server failures or physical damage. Several options provide secure and reliable offsite storage.
Consider using cloud storage services like Amazon S3, Google Cloud Storage, or Dropbox. These services offer various levels of redundancy and security, ensuring your backups are safe even if your primary server is compromised. Alternatively, you can use a remote server or external hard drive, but remember to regularly update and maintain those as well. The key is to have backups in multiple, geographically separate locations.
Remember to encrypt your backups before storing them offsite to protect sensitive data. This adds an extra layer of security in case your backups are ever compromised.
Leveraging WordPress Themes Effectively
Source: pinimg.com
Choosing the right WordPress theme is crucial for creating a visually appealing and functional website. The theme forms the foundation of your site’s design and user experience, impacting everything from its layout to its responsiveness. Selecting between free and premium options requires careful consideration of your needs and resources.
The theme you select significantly impacts your website’s overall look, feel, and functionality. A well-chosen theme can enhance user experience, improve , and streamline content management. Conversely, a poorly chosen theme can lead to design inconsistencies, poor performance, and difficulties in customization.
Free Versus Premium WordPress Themes
The decision between free and premium WordPress themes involves weighing several factors. Both offer advantages and disadvantages, and the best choice depends on your specific project requirements and budget.
- Free Themes:
- Advantages: Cost-effective, readily available, often sufficient for basic websites.
- Disadvantages: Limited customization options, potentially less support, may lack advanced features, security updates might be infrequent or delayed.
- Premium Themes:
- Advantages: Extensive customization options, usually better support, often include advanced features (e.g., optimization, enhanced security), regular updates and security patches.
- Disadvantages: Higher cost, potential for compatibility issues with plugins, reliance on the theme developer for support.
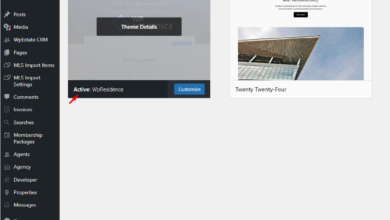
Customizing a Theme’s Appearance Using the WordPress Customizer
The WordPress Customizer provides a user-friendly interface for modifying your theme’s appearance without needing to edit code directly. This “live preview” feature allows you to see changes in real-time before saving them.
Accessing the Customizer is simple: navigate to Appearance > Customize in your WordPress dashboard. From there, you’ll find various options depending on your theme, including:
- Site Identity: Changing your site title, tagline, and logo.
- Colors: Adjusting the colors used throughout your website (background, text, links, etc.).
- Typography: Selecting different fonts and font sizes for headings and body text.
- Widgets: Adding and arranging widgets in sidebars and other designated areas.
- Menus: Creating and managing navigation menus.
- Header & Footer: Customizing the header and footer sections of your website.
Experiment with the different settings to achieve your desired look. Remember to click “Publish” to save your changes.
Child Themes and Preserving Theme Customizations
Creating a child theme is crucial for preserving your customizations when updating your parent theme. A child theme inherits all the functionality and styling of its parent theme but allows you to make modifications without affecting the parent theme’s core files. This is vital because when you update the parent theme, your customizations won’t be overwritten.
To create a child theme, you’ll need basic coding knowledge (or use a plugin that simplifies the process). Essentially, you create a new folder (named after your child theme) within your theme’s directory, containing a style.css file and a functions.php file. The style.css file includes specific code to link it to the parent theme, and the functions.php file is where you add any custom functions or modifications.
For example, the style.css file would contain a line like: /* Theme Name: My Child Theme and
-/ /* Template: parent-theme-name (replacing parent-theme-name with the actual name of your parent theme’s directory).
-/
By using a child theme, you ensure that updates to the parent theme won’t erase your hard work and maintain a stable and customized website.
Closing Notes
Mastering WordPress doesn’t require a computer science degree! By implementing these five easy hacks – streamlining plugins, optimizing your media library, strengthening security, establishing a solid backup plan, and leveraging themes effectively – you’ll transform your WordPress experience. You’ll find your site runs faster, is more secure, and is much easier to manage overall. So go forth, conquer those WordPress challenges, and enjoy a smoother, more efficient website journey!
Quick FAQs
What if I deactivate a plugin and my site breaks?
Always back up your site before making significant changes! If deactivating a plugin causes issues, you can easily restore your site from the backup. Consider using a staging site for testing plugin changes.
How often should I back up my WordPress site?
Ideally, you should back up your site daily or at least weekly. The frequency depends on how often you update your content and plugins.
Are free WordPress themes safe to use?
Many free themes are perfectly safe, but always check the theme’s reviews and ratings before installing it. Look for themes from reputable developers and ensure they are regularly updated.
What’s the best way to compress images without losing quality?
Use a dedicated image compression tool like TinyPNG or ShortPixel. These tools use lossy compression techniques that minimize file size without significantly impacting image quality.
