How to Create an Email Signature in Apple Mail
How to create an email signature in Apple Mail? It might seem simple, but crafting a professional and effective email signature can significantly impact your digital presence. From a basic name and title to a visually appealing signature with a logo and website link, the possibilities are endless. This guide will walk you through creating, customizing, and managing email signatures within Apple Mail, covering everything from basic setup to advanced HTML formatting and troubleshooting common issues.
Get ready to elevate your email game!
We’ll cover everything from finding the signature settings in Apple Mail’s preferences (and navigating the slight differences between macOS versions), to creating a basic signature with your contact information, and adding more advanced elements like a company logo and website link using HTML. We’ll also delve into formatting your signature for optimal readability, managing multiple signatures for different contexts, and troubleshooting those pesky signature glitches that sometimes pop up.
By the end, you’ll be a signature-creating pro!
Accessing Signature Preferences in Apple Mail

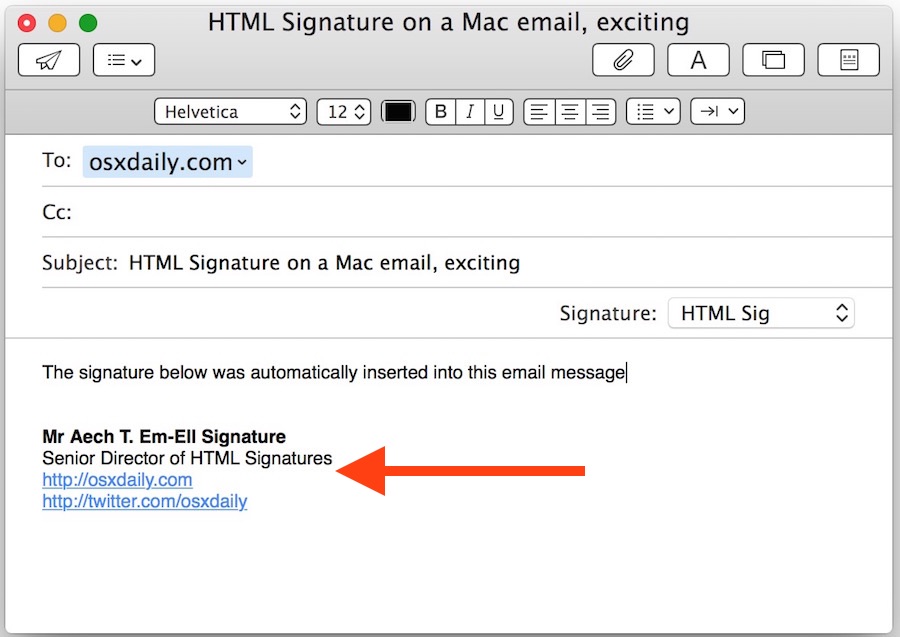
Source: osxdaily.com
Creating a personalized email signature in Apple Mail enhances your professional image and provides convenient contact information. Finding the signature settings, however, can vary slightly depending on your macOS version. This guide will walk you through the process, clarifying the differences.
The location of email signature settings in Apple Mail is consistent across most recent macOS versions, but the visual presentation of the Preferences window might differ subtly. Regardless of your macOS version, the core steps remain the same: navigating to Mail’s preferences and locating the Signatures section. Older versions of macOS might require slightly more clicks, but the fundamental process is similar.
The key is to understand the consistent path to the settings, rather than focusing on superficial differences in the interface.
Locating Signature Settings in Apple Mail Preferences
To access your email signature settings, you first need to open Apple Mail’s preferences. This involves a straightforward process that’s almost identical across various macOS versions. The following steps detail the procedure, with descriptions of what you’ll see on your screen at each stage.
- Open Apple Mail: Launch the Apple Mail application from your Applications folder or your Dock.
- Access Mail Preferences: In the menu bar at the top of your screen, click on “Mail,” then select “Preferences.” This will open a new window displaying various Mail preferences.
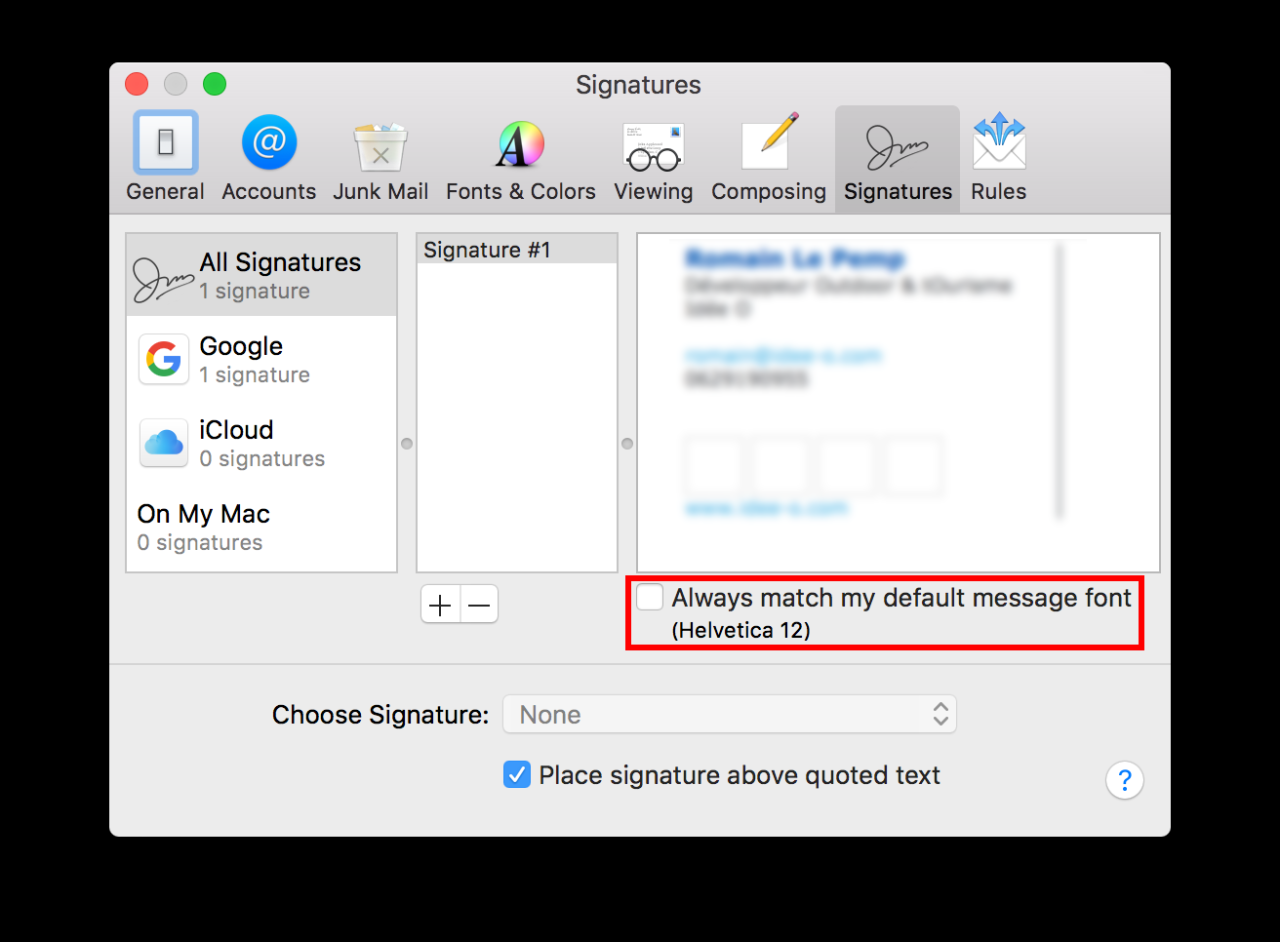
- Navigate to Signatures: In the Preferences window, you’ll see a row of icons or tabs representing different settings categories. Look for an icon or tab labeled “Signatures.” Click on it to open the Signatures preferences panel.
Once you’ve reached the Signatures panel, you can create, edit, or delete your email signatures. The interface will show a list of your email accounts and allow you to select a signature for each account or even create different signatures for different accounts. You’ll also find options to add your name, title, contact information, and even a logo (depending on your file format).
The interface is intuitive and user-friendly, guiding you through the process of creating a professional and informative email signature.
Visual Differences Across macOS Versions
While the core functionality remains the same, the visual appearance of the Preferences window and the Signatures panel may vary slightly depending on your macOS version. For example, in older versions of macOS, the Preferences window might be organized differently, with tabs instead of icons, or the icons might be arranged in a different order. However, the “Signatures” option will always be present within the Mail Preferences.
The underlying steps remain the same: Open Mail, go to Preferences, and find Signatures.
For instance, imagine a screenshot of the Mail Preferences window in macOS Monterey (version 12). The screenshot would show a horizontal row of icons representing different preference categories. One of these icons would clearly be labeled or visually represented as “Signatures”. Now compare this to a screenshot of the Mail Preferences window in an older version of macOS, perhaps macOS High Sierra (version 10.13).
The screenshot might show a horizontal row of tabs, and the “Signatures” option would appear as one of these tabs. The content and functionality are identical, but the presentation differs slightly in visual style. The key is to locate the “Signatures” section, regardless of its visual presentation.
Managing Multiple Email Signatures

Source: zendesk.com
Juggling different email accounts for personal and professional communication often requires distinct email signatures. Luckily, Apple Mail makes managing multiple signatures a breeze, allowing you to tailor your message footer to each context. This ensures professionalism in your work emails while maintaining a personal touch in your private correspondence. This section will guide you through the process of creating, managing, and switching between these different signatures.
Creating Multiple Signatures
To create multiple signatures, you simply repeat the signature creation process described earlier, but give each signature a unique name that clearly reflects its purpose. For instance, you might create signatures titled “Work Signature,” “Personal Signature,” and “Casual Signature.” Remember to craft each signature to suit its intended audience and purpose. The “Work Signature” might include your job title, company name, and contact details, while the “Personal Signature” might be more concise and informal.
Setting up your email signature in Apple Mail is surprisingly easy; just go to Preferences, then Signatures. Once you’ve crafted the perfect professional sign-off, remember to promote your YouTube channel too! Check out this great guide on getting it on with YouTube to learn how to maximize your video presence. Then, simply add your YouTube link to your Apple Mail signature for extra exposure.
It’s a small step that can make a big difference!
Switching Between Signatures
Switching between your various signatures is incredibly straightforward. When composing a new email, look for the signature selection menu (often a small arrow or dropdown menu) located near the bottom of the message composition window. Click this menu, and you’ll see a list of all your saved signatures. Simply select the signature you want to use for that particular email.
The selected signature will automatically appear at the bottom of your email when you send it. There’s no need to manually copy and paste; Apple Mail handles the switching seamlessly.
Setting Default Signatures for Specific Email Accounts
If you use multiple email accounts within Apple Mail (e.g., a Gmail account and an iCloud account), you can set a default signature for each. This means you won’t have to manually select a signature every time you compose a new email. To do this, navigate to Apple Mail’s preferences (as described in the previous section), then locate the “Signatures” section.
You’ll notice a list of your email accounts. For each account, select the appropriate signature from the dropdown menu. Now, whenever you compose an email using that specific account, the default signature you selected will automatically be added. This streamlines your email workflow, ensuring the correct signature is consistently applied.
Troubleshooting Common Issues: How To Create An Email Signature In Apple Mail

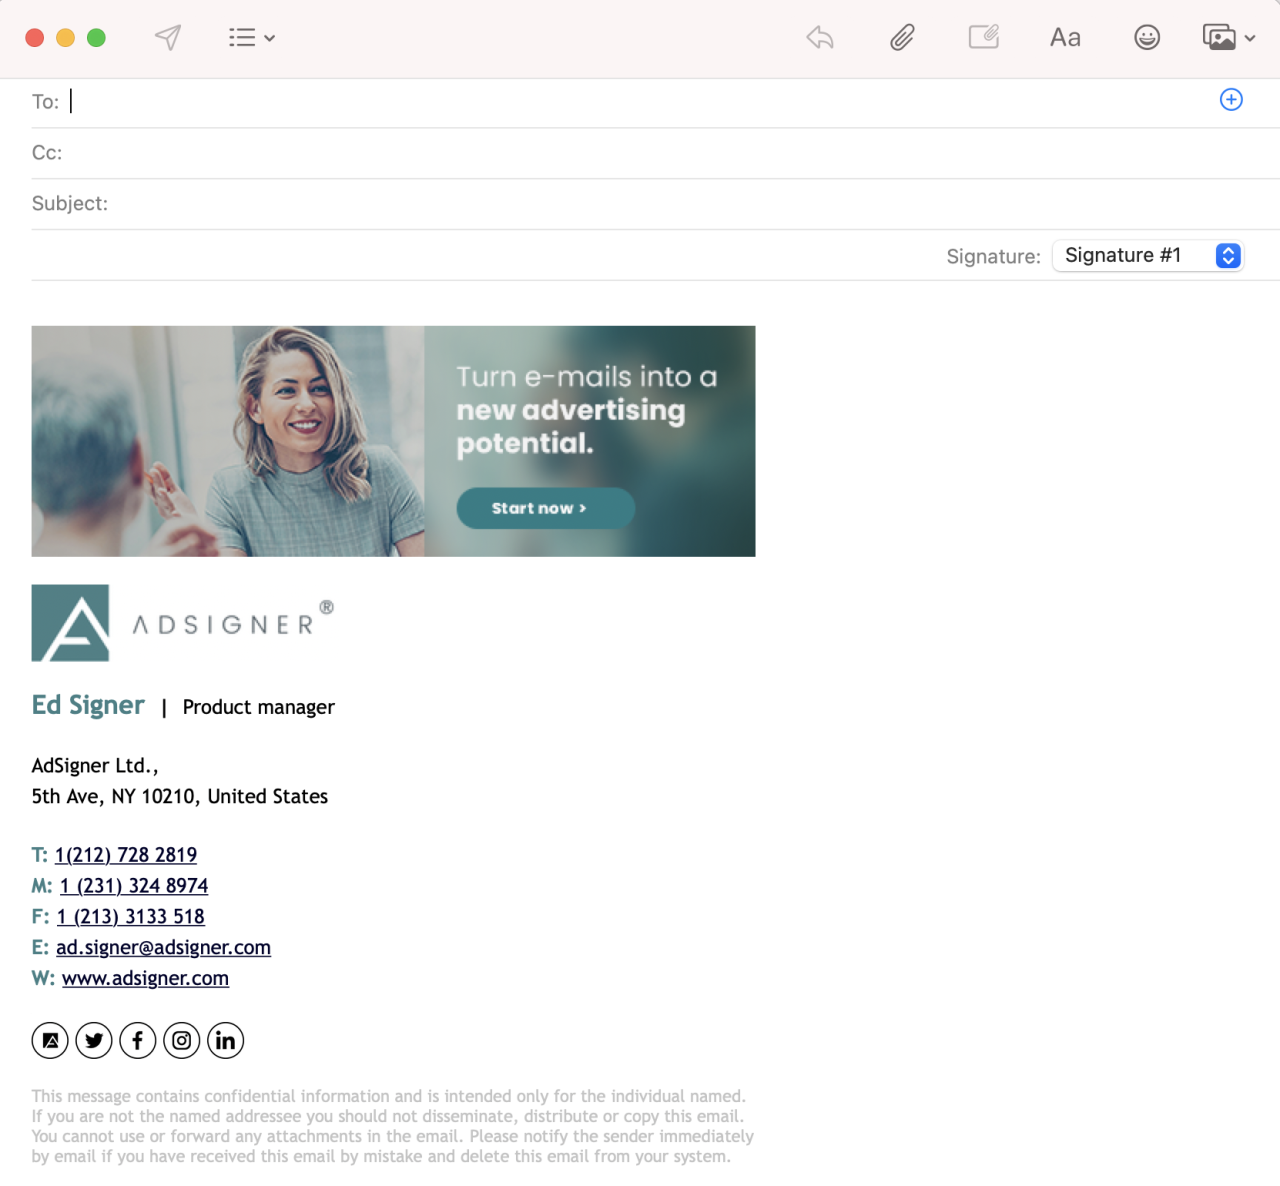
Source: adsigner.com
Creating and managing email signatures in Apple Mail is generally straightforward, but occasionally you might run into a few snags. This section covers some common problems and their solutions, helping you get your signature looking and working perfectly. Remember to always check your outgoing emails to ensure the signature is displaying correctly.
Signature Formatting Problems
If your signature isn’t displaying as intended – perhaps the font is wrong, images are missing, or the spacing is off – several factors could be at play. Firstly, ensure your signature is created using plain text formatting with minimal HTML. While Apple Mail supports some HTML, overly complex formatting can lead to inconsistencies across different email clients. Secondly, check the size and dimensions of any images included in your signature.
Large images can slow down email delivery and may not render correctly on all devices. Consider using smaller, optimized images for better results. Finally, review the signature’s code directly. Sometimes a simple typo or a misplaced tag can cause significant display issues. Carefully examine the signature text in the signature editor to identify any errors.
Signature Not Appearing in Outgoing Emails
This is a frustrating but often solvable issue. First, double-check that you’ve actually selected the correct signature in your Apple Mail preferences. If you’ve created multiple signatures, make sure the one you want is assigned to the account you’re using. Next, ensure that the “Include signature” option is enabled for your email account within the preferences. This setting might have been accidentally toggled off.
If the problem persists, try restarting Apple Mail. A simple restart can often resolve minor software glitches. If the problem still persists after these steps, try creating a completely new signature from scratch. This can help rule out any issues with the existing signature file. A simple text-only signature might help determine if it’s a formatting or a broader application issue.
Signature Display Differences Across Email Clients
Your signature might appear slightly different depending on the email client used to view it (e.g., Outlook, Gmail, Yahoo Mail). This is due to differences in how email clients render HTML and images. To minimize these inconsistencies, stick to plain text formatting as much as possible and avoid complex HTML. Using widely supported fonts and keeping image sizes small will also contribute to a more consistent appearance across different email clients.
For example, a signature using a standard font like Times New Roman or Arial will likely render correctly across most platforms, unlike a more specialized or uncommon font. Test your signature by sending test emails to yourself using different email clients to identify any significant discrepancies.
Best Practices for Email Signatures
Crafting the perfect email signature is more than just slapping your name and contact details at the bottom of your message. A well-designed signature contributes significantly to your professional image and brand consistency across all your communications. It’s a small detail that can have a surprisingly large impact.Your email signature is a mini-billboard for your personal or professional brand.
Consistency is key. Think of it as a visual extension of your website or business card. A cohesive brand image across all platforms reinforces trust and recognition, making you more memorable and professional. Inconsistent branding, on the other hand, can appear unprofessional and dilute your message. Maintaining a consistent font, color scheme, logo, and overall style across all your communications, including your email signature, is crucial for a polished and professional appearance.
Brand Image Consistency in Email Signatures
Maintaining a consistent brand image across your email signatures is vital for professional communication. This involves using the same logo, colors, fonts, and overall design style as your website, business cards, and other marketing materials. For instance, if your company uses a specific shade of blue and a particular font family, your email signature should reflect this. This consistency reinforces brand recognition and helps maintain a professional image.
Inconsistency, conversely, can lead to a fragmented brand identity and dilute your message. A well-designed signature that mirrors your brand’s visual identity helps solidify your professional image and builds trust with recipients.
Accessible Email Signature Design
Designing an accessible email signature ensures that everyone can easily read and understand the information provided. This means considering users with visual impairments, cognitive disabilities, and other accessibility needs. Avoid using overly complex layouts or graphics. Stick to simple, clear fonts that are easily readable at various sizes. Consider using a sans-serif font like Arial or Calibri for better readability.
Use sufficient color contrast between text and background to ensure readability for people with low vision. For example, dark text on a light background is generally recommended. Avoid using small font sizes or overly intricate graphics that may be difficult to interpret. Finally, ensure that all links are descriptive and clearly indicate where they lead.
Visually Appealing and Effective Email Signatures: Different Approaches, How to create an email signature in apple mail
There are several approaches to creating visually appealing and effective email signatures. A simple text-based signature with your name, title, and contact information is a classic and effective choice, especially for professional contexts. This approach prioritizes clarity and readability. Alternatively, a more visually rich signature can include a small logo, a professional headshot, and social media links.
This approach can be more engaging but requires careful design to avoid appearing cluttered or unprofessional. The best approach depends on your individual needs and preferences, but the goal should always be to create a signature that is both visually appealing and easily readable. A balanced approach often works best, incorporating a logo and key contact information while maintaining a clean and uncluttered design.
Outcome Summary
Creating the perfect email signature in Apple Mail is easier than you think! By following the steps Artikeld above, you can craft a professional and effective signature that reflects your brand and enhances your communication. Remember to keep it concise, visually appealing, and consistent across all your email accounts. Now go forth and impress your recipients with your polished and professional email signatures!
Essential Questionnaire
Can I use different signatures for different email accounts in Apple Mail?
Yes! Apple Mail allows you to create and assign different signatures to each email account you have set up.
What if my signature isn’t showing up in my outgoing emails?
Check your Apple Mail preferences to ensure the signature is correctly assigned to the account. Also, make sure you haven’t accidentally disabled signature display.
Can I add a picture to my email signature?
Yes, you can add a picture (like a logo) by embedding an image using HTML. Make sure the image file is accessible to your email client.
How do I make my signature responsive across different devices?
Using HTML tables with appropriate column attributes and keeping the design simple will improve responsiveness across various devices.
