How to Add Fonts to Google Docs and Google Slides
How to add fonts to Google Docs and Google Slides? It’s a question many of us have wrestled with, especially when we need that perfect font to make our documents pop. Whether you’re crafting a professional presentation or a captivating report, the right font can elevate your work. This guide dives into the different methods – from uploading your own custom fonts to leveraging the power of Google Fonts – ensuring you find the perfect typographic solution for your needs.
We’ll cover potential pitfalls and offer troubleshooting tips to keep your font-related frustrations to a minimum. Get ready to unleash your inner typography enthusiast!
This post will walk you through understanding Google Docs and Slides’ built-in font options, comparing them to system fonts and exploring how font rendering varies across different devices. We’ll then delve into the practical steps of uploading your own custom fonts (.ttf, .otf), highlighting potential issues and solutions. A crucial section will cover using Google Fonts – their advantages, disadvantages, and how to seamlessly integrate them into your documents.
Finally, we’ll tackle common font issues, offering practical troubleshooting advice and exploring alternative text styling techniques.
Understanding Google Docs & Slides Font Limitations

Source: alwaysamy.ca
Google Docs and Slides offer a convenient way to create and share documents and presentations, but their font options aren’t limitless. Understanding these limitations is crucial for ensuring your documents look professional and consistent across different platforms. This involves knowing what fonts are readily available, how they differ from system fonts, and how their appearance can vary depending on your setup.
By default, Google Docs and Slides provide a selection of common fonts, generally including a range of sans-serif and serif options like Arial, Times New Roman, Calibri, and others. These fonts are pre-installed and optimized for web rendering, ensuring consistent appearance across various devices and browsers. However, this curated list is not exhaustive, and you’ll likely encounter situations where you need to add your own fonts for specific branding or stylistic reasons.
Default Font Options and Their Characteristics
Google’s default font selection prioritizes cross-platform compatibility and readability. The choice of fonts balances legibility with visual appeal. For example, Arial, a sans-serif font, is known for its clean and modern appearance, suitable for various contexts. Times New Roman, a serif font, offers a more traditional and formal feel, often preferred for longer text blocks. Calibri, another sans-serif option, strikes a balance between modern and classic aesthetics.
So you’re wondering how to add fonts to Google Docs and Slides? It’s surprisingly easy, just upload your .ttf file! But once your document looks amazing, you’ll want to share it, right? That’s where learning about video editing comes in; check out this awesome guide on getting it on with YouTube to create stunning video tutorials showcasing your beautifully-fonted Google Docs creations.
Then, you can share your font knowledge with the world!
The specific fonts available may change slightly over time as Google updates its offerings, but the general principle of providing a versatile selection of widely-used fonts remains.
System Fonts versus Google Docs/Slides Fonts
A key distinction lies between fonts installed on your operating system (system fonts) and those used within Google Docs and Slides. System fonts are those available to all applications on your computer. Google Docs and Slides, however, primarily utilize their own subset of fonts optimized for web rendering. While you can upload custom fonts to Google Docs and Slides, these fonts are only accessible within those applications and aren’t directly added to your system’s font library.
This means that if you use a custom font in a Google Doc and then open that document on a different computer that doesn’t have that font installed, Google Docs will substitute a similar default font, potentially altering the visual presentation.
Font Rendering Across Browsers and Devices
Font rendering—the way fonts appear on screen—can vary significantly depending on the browser, operating system, and device you are using. While Google strives for consistency, subtle differences are inevitable. For example, a font might appear slightly bolder or thinner, or have slightly different spacing between letters (kerning) across different browsers like Chrome, Firefox, or Safari. Similarly, the rendering on a high-resolution retina display will differ from that on a lower-resolution screen.
These variations are often minor and rarely impactful, but they are important to consider when designing documents intended for wide distribution. Testing your document on various browsers and devices is recommended to ensure consistent presentation.
Adding Custom Fonts
So you’ve hit a wall with Google Docs and Slides’ built-in fonts. You need something specific, something unique, something…yours*. That’s where uploading custom fonts comes in. This method lets you bring your own font files into Google’s ecosystem, adding a personal touch to your documents and presentations. Let’s dive into how it’s done.
Uploading Custom Fonts, How to add fonts to google docs and google slides
Adding a custom font to Google Docs or Slides involves uploading a font file directly. This is straightforward, but there are a few things to keep in mind about file types and potential issues. You’ll need a font file in either .ttf (TrueType Font) or .otf (OpenType Font) format. These are the most common font formats and are generally compatible with Google’s services.
The process is virtually identical for both Google Docs and Google Slides. Here’s a step-by-step guide:
- Locate your font file: Find the .ttf or .otf file on your computer. This might be in your Downloads folder, a dedicated fonts folder, or wherever you saved it.
- Open Google Docs or Slides: Create a new document or open an existing one.
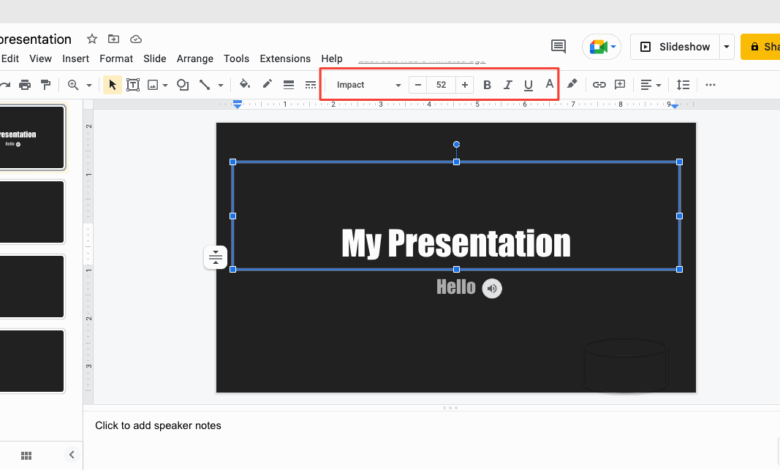
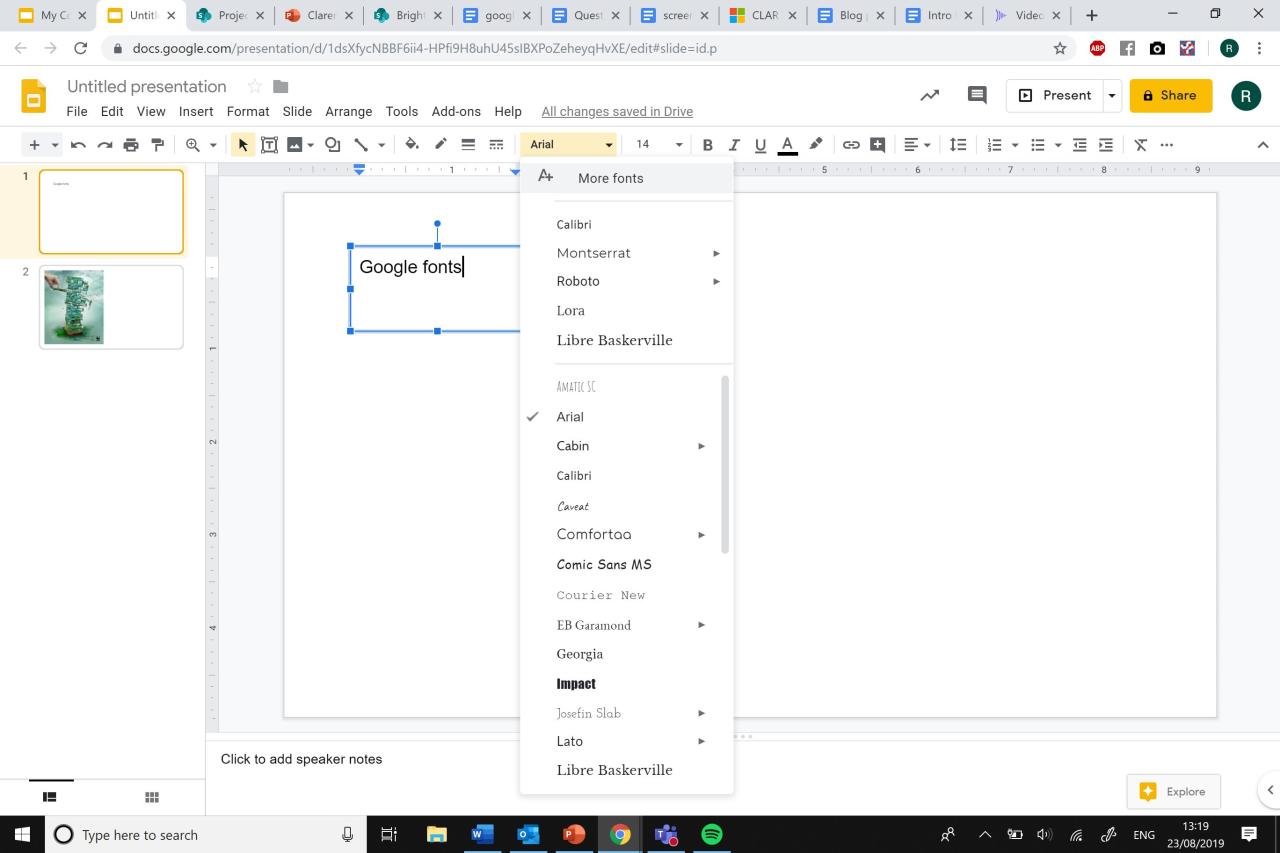
- Access the font menu: In both Docs and Slides, you’ll find the font selection tool in the toolbar. It usually looks like a small ‘A’ with a dropdown arrow.
- Locate the “More fonts” option: Click on the dropdown arrow within the font menu. You should see an option like “More fonts” or a similar label near the bottom of the menu. This option opens up the font selection window.
- Upload your font: Within the “More fonts” window, you should see a button or link that allows you to upload a font file. This might be labeled “Upload fonts” or something similar. Click this button.
- Select your font file: A file selection window will appear. Navigate to the location of your .ttf or .otf file and select it. Click “Open” or the equivalent button.
- Wait for the upload: Google will process the upload. This may take a few seconds or minutes, depending on your internet connection and the size of the font file.
- Use your new font: Once the upload is complete, your custom font should appear in the font menu, ready for use. Select it to apply it to your text.
Troubleshooting Font Upload Issues
While generally straightforward, font uploads can sometimes encounter problems.
Here are some common issues and their solutions:
- Font file not recognized: Ensure you are uploading a valid .ttf or .otf file. Corrupted files might fail to upload. Try downloading the font again from a reliable source.
- Upload failure: A slow or unstable internet connection can interrupt the upload. Try uploading again when your connection is stable. Large font files may also take longer to upload.
- Font not appearing in the menu: After uploading, give it a moment to appear. Sometimes there’s a slight delay. If it still doesn’t appear, try refreshing your browser or restarting Google Docs/Slides.
- Font rendering issues: If the font appears but looks distorted or incorrect, the font file itself might be corrupted or incompatible with Google Docs/Slides. Try using a different font file.
Using Google Fonts in Documents & Slides
Source: brightcarbon.com
Google Fonts offers a vast library of free, open-source fonts that you can seamlessly integrate into your Google Docs and Slides presentations. This significantly expands your design options beyond the default font selection, allowing you to create visually appealing and consistent documents. Let’s explore how to effectively leverage this resource.
Integrating Google Fonts into your Google Workspace projects is surprisingly straightforward, providing a powerful way to enhance the visual impact of your documents and presentations. By understanding the various font categories and the process of embedding them, you can create professional-looking work that stands out.
Google Font Categories
Google Fonts is categorized to help you quickly find the perfect font for your project. Understanding these categories helps you choose fonts that best suit your document’s style and tone. The table below shows examples of fonts within each category. Remember that many fonts can cross over into multiple categories depending on their design characteristics.
| Category | Font Family | Example 1 | Example 2 |
|---|---|---|---|
| Serif | Roboto Serif | Merriweather | Playfair Display |
| Sans-serif | Roboto | Open Sans | Lato |
| Monospace | Source Code Pro | Courier Prime | Anonymous Pro |
| Display | Pacifico | Lobster | Bangers |
| Handwriting | Dancing Script | Great Vibes | Amatic SC |
Embedding Google Fonts Directly
While Google Docs and Slides don’t directly support uploading custom font files, they allow you to utilize fonts from the Google Fonts library. This is done by embedding the font’s CSS code into your document using the Google Fonts website.
First, navigate to the Google Fonts website . Browse and select the font(s) you want to use. Once selected, click the “Select this style” button for each font variation (e.g., regular, bold, italic). After making your selections, click the “+Select this family” button. You’ll then be presented with an embed code snippet.
This snippet contains a ` ` tag that includes a CSS stylesheet from Google Fonts. You would typically embed this code into the ` ` section of an HTML document, but for Google Docs and Slides, you’ll need to use a workaround. Currently, this is not directly supported within Google Docs and Slides; therefore, this method is not practical for these applications. The best practice remains to select fonts available within the application.
Advantages and Disadvantages of Using Google Fonts
Using Google Fonts offers several advantages, but also has some limitations to consider.
- Advantages: Wide selection of high-quality fonts, free to use, easy integration (within the application’s font selection), consistent cross-platform rendering.
- Disadvantages: Reliance on an internet connection to render fonts, potential for inconsistencies across different devices (although this is minimal), limited control over font variations compared to local font installation.
Font Management & Best Practices
So, you’ve successfully added some custom fonts to your Google Docs and Slides. Fantastic! But now comes the crucial part: managing them effectively. Using fonts haphazardly can lead to documents that are visually jarring and difficult to read. Let’s explore how to keep your font choices organized and aesthetically pleasing.
Effective font management isn’t just about aesthetics; it’s about ensuring readability and consistency across your documents. A well-chosen and consistently applied font scheme contributes significantly to the overall professional look and feel of your work. Poor font management, on the other hand, can create a chaotic and unprofessional impression.
Font Management Workflow
A clear workflow is key to successful font management. The following flowchart visually represents the process of adding and managing custom fonts within Google Docs and Slides.
Imagine a flowchart with these boxes and connecting arrows: Start –> Identify Needed Fonts (consider project needs, brand guidelines, readability) –> Source Fonts (Google Fonts, uploaded files) –> Add Fonts to Google Docs/Slides (using the “More fonts” option) –> Test Font Usage (check readability, visual appeal in different contexts) –> Refine Font Choices (adjust based on testing) –> Save & Share Document –> End. Arrows connect each step logically.
The “Refine Font Choices” step might involve iterative testing and adjustments until the desired aesthetic and readability are achieved. For example, if a chosen font proves difficult to read in a smaller size, the designer might select an alternative.
Problems Associated with Excessive Font Usage
While variety is nice, using too many custom fonts in a single document can severely impact readability and overall design. Overusing fonts creates visual clutter and makes the document harder to digest. This can be particularly problematic for longer documents or presentations.
- Reduced Readability: A mix of too many fonts can make the text harder to read, leading to reader fatigue and comprehension issues. Imagine a document with five different fonts, each with varying weights and styles – the visual inconsistency will distract and frustrate the reader.
- Inconsistent Branding: If you’re creating documents for a company or organization, using too many fonts can undermine brand consistency and dilute your visual identity. A strong brand relies on a consistent and recognizable visual language, and font choice is a crucial element of this.
- Amateurish Appearance: Excessive font usage often results in a document that looks unprofessional and amateurish. It signals a lack of attention to detail and design principles.
Best Practices for Font Selection
Choosing the right fonts is crucial for creating visually appealing and readable documents. Consider these guidelines:
- Prioritize Readability: Select fonts that are easy to read, especially in smaller sizes. Serif fonts (like Times New Roman or Garamond) are often preferred for body text, while sans-serif fonts (like Arial or Calibri) work well for headings and titles. However, this is a guideline, not a hard and fast rule; experiment to find what works best for your content.
- Maintain Consistency: Stick to a limited number of fonts (generally 2-3) throughout a single document. Use one font for body text and another for headings or titles. Consider using variations in weight (bold, italic) within a single font family to create visual hierarchy instead of adding entirely new fonts.
- Consider Context: The appropriate font will vary depending on the document’s purpose and audience. A playful font might be suitable for a children’s book, but it would be inappropriate for a legal document. A professional, clean font is generally preferred for formal documents.
- Test and Iterate: Always test your font choices on different devices and screen sizes to ensure readability and consistency across platforms. Print a test page to check how the fonts appear in print.
Troubleshooting Common Font Issues
Adding custom fonts to Google Docs and Slides can significantly enhance your documents’ visual appeal, but it’s not always a smooth process. Sometimes, unexpected issues arise, leading to frustration. This section will address common problems and provide practical solutions to get your fonts displaying correctly.
Font problems in Google Docs and Slides can stem from several sources, including browser compatibility, operating system differences, font file corruption, and conflicts with existing fonts. Understanding these potential issues is the first step towards resolving them effectively.
Font Display Problems Across Devices
Inconsistencies in font rendering can occur across different devices and operating systems. A font that looks perfect on your desktop computer might appear distorted or substituted on a mobile device or a different operating system. This is often due to differences in font rendering engines and the availability of specific fonts on each system. For example, a custom font you uploaded might be perfectly displayed on your Windows machine but substituted with a default font on a Mac because the specific font isn’t installed or supported.
To mitigate this, consider using widely available web fonts from Google Fonts or other reliable sources, ensuring broad compatibility across various platforms. If using a custom font is essential, preview your document on multiple devices and operating systems before finalizing it to identify and address any display issues.
Font File Corruption
Occasionally, the font file itself might be corrupted, preventing Google Docs or Slides from rendering it correctly. This can manifest as garbled characters, missing glyphs, or the font not appearing at all. If you suspect a corrupted font file, try downloading it again from the original source. If the problem persists, consider using a different font file. It’s also helpful to verify the font file type; ensure it’s in a format compatible with Google Docs and Slides (typically .ttf or .otf).
Font Conflicts and Inconsistencies
Conflicts can arise when multiple fonts with similar names or characteristics are present. For instance, if you have two fonts named “Arial,” one uploaded as a custom font and another already installed on your system, Google Docs might choose one over the other inconsistently, leading to unexpected changes in your document’s appearance. To avoid such conflicts, use unique font names and carefully manage your font collection.
Regularly review and remove unnecessary or duplicate fonts to maintain a clean and consistent font environment within your Google Workspace. Using Google Fonts helps reduce this problem as they are designed to work seamlessly within the Google ecosystem.
Troubleshooting Steps for Font Issues
If you encounter font problems, these steps can help:
- Check your internet connection: A slow or unstable internet connection can affect font loading.
- Clear your browser cache and cookies: This can resolve issues caused by outdated or corrupted cached data.
- Restart your browser and computer: A simple restart can often resolve temporary glitches.
- Try a different browser: If the problem persists in one browser, try another to see if it’s browser-specific.
- Update your operating system and browser: Outdated software can sometimes cause compatibility issues.
- Convert the font file to a different format: If you’re using a less common font format, try converting it to .ttf or .otf.
- Use a different font: If all else fails, choose a different font that is known to work reliably.
Alternative Methods for Font Styling
Let’s face it, sometimes you just can’t find theperfect* font in Google Docs or Slides. But before you start hunting down custom fonts, remember that you can achieve a surprising amount of visual variety using the built-in formatting tools. These options offer a powerful way to add stylistic flair without needing external fonts.Exploring Google Docs and Slides’ built-in formatting options opens up a world of design possibilities.
Mastering these techniques allows you to create visually appealing documents without relying on custom fonts, keeping your documents consistent and accessible across different platforms. You’ll be amazed at the stylistic range achievable through careful application of these tools.
Text Formatting for Visual Impact
The basic formatting options – bold, italic, underline, and strikethrough – are your foundational tools. Don’t underestimate their power! Using combinations of these can create interesting effects. For example, bolding a within an italicized sentence creates emphasis, while underlining headings can improve readability. Consider using bold and italic together for particularly important terms, or using strikethrough to indicate outdated or superseded information.
The key is strategic application to guide the reader’s eye and highlight key information. Avoid overusing these options, as excessive formatting can make your document appear cluttered and unprofessional.
Text Highlighting and Other Formatting Tools
Beyond the basics, Google Docs and Slides offer text highlighting, which is a fantastic way to draw attention to specific sections or phrases. You can use different highlight colors to categorize information or indicate different levels of importance. Think of using yellow for key terms, green for examples, and pink for action items. The color choices should be consistent and meaningful to maintain clarity.Beyond highlighting, you can also explore options like changing text color, adjusting font size (for headings or emphasis), and using superscript or subscript for specialized notation (like chemical formulas or footnotes).
Remember that consistency is key; maintain a consistent style throughout your document to avoid a chaotic visual experience.
Creating Visual Hierarchy with Formatting
Effective formatting contributes significantly to a document’s readability and overall aesthetic appeal. By strategically employing various formatting techniques such as bolding, italicizing, underlining, highlighting, and adjusting font sizes, you can create a visual hierarchy that guides the reader’s eye through the content. For instance, using larger, bolder fonts for headings, and smaller, less emphasized fonts for body text, establishes a clear visual structure.
Similarly, highlighting key terms or phrases aids in quick comprehension and information retrieval. A well-structured document, formatted using the built-in options, not only looks professional but also enhances its readability and overall impact.
Conclusive Thoughts

Source: marketsplash.com
Mastering the art of font selection and implementation in Google Docs and Slides is a game-changer for anyone aiming to create visually appealing and professional documents. From understanding the limitations of default fonts to harnessing the power of Google Fonts and troubleshooting common issues, this guide provides a comprehensive approach. Remember, the right font can significantly impact the readability and overall aesthetic appeal of your work.
So, experiment, explore, and find the fonts that best reflect your style and message!
FAQ Insights: How To Add Fonts To Google Docs And Google Slides
Can I use any font I have on my computer in Google Docs/Slides?
Not directly. Google Docs and Slides have a limited selection of built-in fonts. You can upload custom fonts, but they might not render perfectly across all devices.
What if my uploaded font doesn’t appear?
Check the file type (.ttf or .otf) and ensure it’s a valid font file. Restart your browser and try uploading again. Sometimes, there are temporary server issues.
Are there any limitations on the number of custom fonts I can use?
While there’s no strict limit, using too many custom fonts in one document can slow down loading times and potentially cause display issues. Stick to a few carefully chosen fonts for optimal results.
What’s the best way to choose fonts for readability?
Prioritize clear and legible fonts. Consider the context; a serif font might be better for body text, while a sans-serif font could be more suitable for headings.