Creating Master Pages with InDesign 5 Easy Steps
Creating master pages with indesign 5 easy to follow steps – Creating Master Pages with InDesign: 5 Easy Steps – Ever wished you could streamline your InDesign workflow and maintain a consistent brand across multiple pages? Master pages are your secret weapon! This guide walks you through five simple steps to create stunning, consistent documents, saving you time and frustration. Get ready to unlock the power of master pages and elevate your design game.
From setting up essential elements like headers and footers to managing multiple master pages for complex documents, we’ll cover everything you need to know. We’ll explore best practices, troubleshoot common issues, and even show you how to efficiently manage different page layouts for various document types, such as books, brochures, and newsletters. Let’s dive in!
Introduction to InDesign Master Pages

Source: recosoft.com
Master pages in Adobe InDesign are a powerful tool that significantly streamlines the design process, especially for projects requiring consistent branding and layout across multiple pages. They act as templates, allowing you to create a consistent foundation for your document, saving you time and effort in the long run. Think of them as the blueprint for your entire publication.Master pages allow you to establish a consistent design language across your document.
This consistency is crucial for maintaining a professional and polished look, ensuring your brand remains recognizable and impactful throughout. Elements like headers, footers, page numbers, and even background graphics can be effortlessly applied to every page by simply linking them to a master page. This eliminates the need to manually replicate these elements on each individual page, significantly speeding up your workflow.
Creating a New Master Page in InDesign
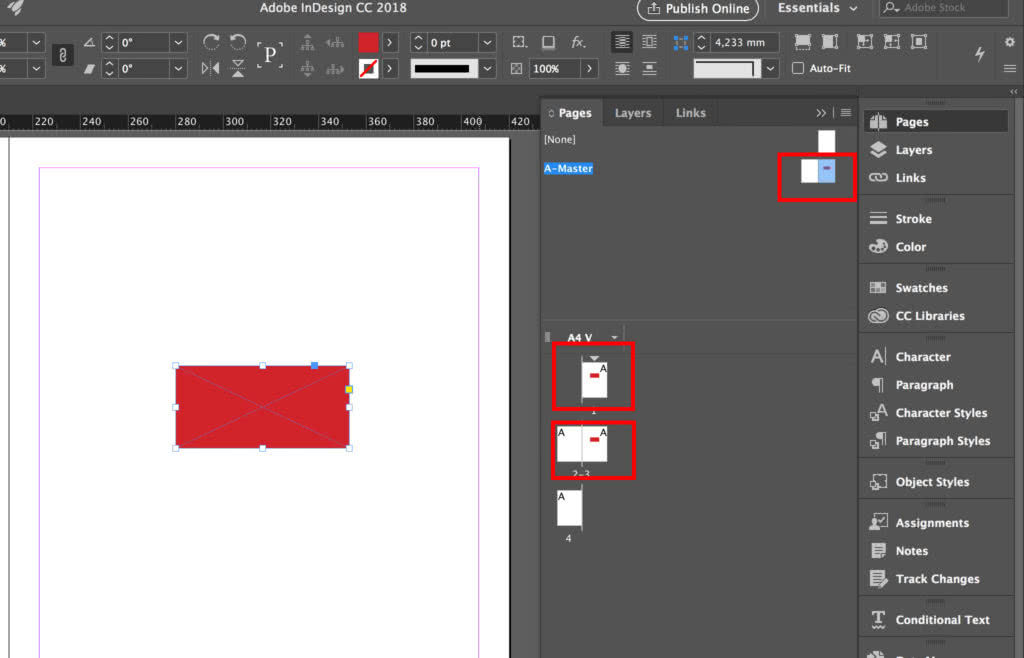
To create a new master page, navigate to the Pages panel (Window > Pages). At the bottom of the panel, you’ll find a small icon that looks like a page with a corner curled up. Click this icon to create a new master page. InDesign will automatically name the new page “A-Master,” but you can rename it to something more descriptive (e.g., “Chapter Master,” “Cover Master”) by double-clicking its name in the Pages panel.
This descriptive naming convention will help you organize your master pages efficiently, particularly in complex projects. Once you’ve created your master page, you can add any elements you want to appear consistently throughout your document, such as logos, running headers and footers, page numbers, or background graphics. These elements will automatically be applied to any pages linked to that master page.
Remember to drag and drop the page to the desired location in the page hierarchy. For example, you might create separate master pages for different sections of a book (e.g., one for the chapters, another for the cover).
Setting Up Your Master Page
Creating a master page in InDesign is like building the foundation of your document. It’s where you define the consistent elements that will appear on every page, saving you time and ensuring a professional look. By setting up your master page correctly, you’ll streamline your workflow and maintain a unified design throughout your project.This section details how to design a master page layout, including headers, footers, page numbers, and running heads, and provides best practices for organization.
We’ll walk through creating a sample master page and discuss efficient workflow strategies.
So, you’re ready to conquer InDesign’s master pages with my 5 easy steps? It’s a game-changer for consistent branding across your projects. Once you’ve mastered those, think about how you’ll showcase your stunning designs – maybe by creating a tutorial video and uploading it to YouTube! Check out this awesome guide on getting it on with YouTube to boost your reach.
Then, get back to perfecting those InDesign master pages – you’ll be amazed at the time you save!
Master Page Layout: Headers, Footers, and Page Numbers
A well-designed master page significantly improves efficiency. Consistent elements like headers, footers, and page numbers are automatically applied to each page, eliminating the need for manual repetition. This section explains how to implement these essential components. Consider your overall design and brand guidelines when selecting fonts, sizes, and placement.To create a header, select the master page in the Pages panel.
Then, using text boxes, place your header content at the top of the page. For a footer, repeat the process at the bottom. InDesign offers automatic page numbering; you can access this feature through the “Type” menu, selecting “Insert Special Character,” then “Markers,” and finally “Current Page Number.” A running head, often a shortened title or chapter heading, can be added similarly to the header, providing context for each page.
Creating a Sample Master Page
Let’s create a simple, yet effective, master page. Imagine a brochure for a fictional coffee shop, “The Daily Grind.” We’ll create a master page with a header including the shop’s logo (imagine a stylized coffee bean graphic here, positioned to the left), the shop’s name (“The Daily Grind”) in a larger font size to the right, and a footer containing the page number centered at the bottom.For the header, create two text boxes: one for the logo and one for the text.
Position them appropriately. For the footer, create a single text box, center-align it, and insert the page number using the method described above. Remember to choose fonts and colors consistent with your brand. This master page will automatically apply this consistent header and footer to every page of your brochure.
Best Practices for Master Page Organization
Organizing your master pages effectively is crucial for large projects. InDesign allows you to create multiple master pages, each tailored to different sections of your document (e.g., a master page for chapters, another for appendices). Clearly naming your master pages (e.g., “Master-Chapter,” “Master-Appendix”) enhances navigation. Using layers within each master page further aids organization by grouping elements logically (e.g., a layer for headers, another for footers).
This layered approach prevents accidental modifications and simplifies editing. A well-organized master page structure will ensure a streamlined and efficient workflow throughout your design process.
Adding and Managing Page Elements on Master Pages

Source: webflow.com
Master pages are the foundation of your InDesign document, providing a consistent layout across all pages. Effectively managing elements on your master page is crucial for maintaining a professional and efficient workflow. This involves strategically adding and organizing design elements while leveraging InDesign’s features for style consistency and organization.Adding design elements to your master page is straightforward. You can drag and drop text boxes, images, and other objects directly onto the master page canvas.
Remember, anything placed on the master page will appear on every page based on that master, unless overridden. This makes it perfect for things like page numbers, headers, footers, and consistent design elements like logos or background images.
Adding Text Boxes, Images, and Other Design Elements
InDesign offers a variety of tools for adding elements. The Rectangle Frame Tool creates a frame for images, while the Type Tool creates text boxes. You can use the Ellipse Frame Tool for circular images or other shapes. Once placed, these elements can be resized, repositioned, and styled using the tools in the Properties panel. For example, you might place a logo in the top-left corner using the Rectangle Frame Tool, then add a page number in the bottom-right using the Type Tool.
Remember to lock layers containing crucial elements to prevent accidental modifications.
Using Styles and Paragraph Styles for Consistency
Maintaining a consistent style across your document is paramount. InDesign’s Styles and Paragraph Styles panels are invaluable for this. Instead of manually formatting each instance of text or a design element, create a style once and apply it throughout your document. This ensures consistency and makes updating your design a breeze. For example, you could create a “Header Style” for all header text, ensuring the same font, size, and formatting is used consistently across all pages.
Similarly, creating paragraph styles for body text, captions, and other elements ensures consistency in formatting.
Using Layers for Organizing Elements on Master Pages, Creating master pages with indesign 5 easy to follow steps
Organizing elements on your master page using layers is essential for managing complexity. Layers allow you to group related elements, making it easier to select, move, and edit specific parts of your design without affecting others. For instance, you might have separate layers for your header, footer, background elements, and page numbers. This keeps your master page organized and manageable, preventing accidental edits and streamlining your workflow.
Always name your layers descriptively for better organization.
Element Placement Examples
| Element Type | Placement | Style | Notes |
|---|---|---|---|
| Logo | Top Left Corner | Embedded Image, locked layer | Use a high-resolution image for best results |
| Page Number | Bottom Right Corner | Right-aligned, small font size | Use a text frame with auto-page numbering |
| Header Text | Top Center | Predefined Header Style | Ensure sufficient spacing from the top edge |
| Footer Text | Bottom Center | Predefined Footer Style | Consider adding copyright information |
Working with Multiple Master Pages: Creating Master Pages With Indesign 5 Easy To Follow Steps
Master pages are the backbone of efficient InDesign document creation, providing a consistent foundation for your layouts. While a single master page is sufficient for simple documents, leveraging multiple master pages unlocks significant organizational power and streamlines the design process, especially for complex projects like books, brochures, or newsletters. This allows for distinct page layouts tailored to different sections, maintaining a unified brand identity while accommodating varying content needs.Using multiple master pages significantly boosts efficiency and consistency in your InDesign projects.
Instead of manually recreating similar elements on every page, you establish these elements once on the appropriate master page, ensuring uniformity throughout your document. This is particularly helpful for large documents with multiple sections requiring different header/footer styles, page numbering schemes, or column structures. For instance, a book might have one master page for chapters, another for the table of contents, and a third for the index.
Master Page Organization Strategies
Effective organization is key when working with multiple master pages. A well-defined structure prevents confusion and ensures easy management of your document’s layout. Consider using a clear naming convention for your master pages (e.g., “Master-Chapter,” “Master-TOC,” “Master-Index”) to instantly identify their purpose. This clear system allows you to quickly locate and apply the correct master page to specific pages within your document.
Think of it like building with prefabricated components; each component (master page) serves a specific purpose, and assembling them correctly creates a cohesive whole.
Comparing Master Pages for Different Document Sections
Different sections of a document often require unique layouts. A book’s chapter pages, for instance, might necessitate a two-column layout with running headers and footers, while the table of contents may need a single-column layout with a different header style and page numbering. Using separate master pages for these sections ensures each adheres to its specific design requirements.
Similarly, a newsletter might employ one master page for articles, another for advertisements, and a third for the masthead. The key is to identify the recurring design elements in each section and create a dedicated master page to manage them.
Examples of Master Page Layouts for Different Document Types
Let’s explore some examples. For a book, you could have: “A-Chapter” (two-column layout, chapter title, running header/footer, page numbers), “B-TOC” (single-column layout, different header, page numbers styled as Roman numerals), “C-Index” (single-column layout, alphabetical index, different footer). A brochure might use “A-Cover” (full-bleed image, minimal text), “B-Inside” (three-column layout, consistent header/footer), “C-Back” (contact information, logo). Finally, a newsletter might use “A-Article” (two-column layout, article title, sidebar), “B-Ad” (full-width layout for advertisements), and “C-Masthead” (newsletter name, contact info, publication details).
Each master page acts as a template, ensuring consistency and minimizing repetitive tasks.
Last Point

Source: ytimg.com
Mastering master pages in InDesign is a game-changer for any designer. By following these five easy steps, you’ll not only save valuable time but also create professionally consistent documents that reflect your brand perfectly. Remember, the key is planning and organization – designing your master pages thoughtfully will streamline your entire workflow. So go ahead, unleash your creativity and build beautiful, consistent documents with ease!
Essential Questionnaire
Can I edit a master page after it’s been applied to pages?
Yes! Changes made to a master page will automatically update all linked pages. However, you can always override specific elements on individual pages if needed.
How do I create different master pages for different sections of a document?
Simply create multiple master pages and assign them to different page ranges or sections within your InDesign document. This is particularly useful for books or reports with varying layouts.
What happens if I delete a master page that’s been applied to pages?
The pages linked to the deleted master page will revert to the default master page. Be sure to save a backup before deleting any master pages.
How do I add page numbers to my master page?
Use the ‘Insert’ menu, choose ‘Page Number’, and position it in your footer or header. InDesign automatically updates page numbers as you add or remove pages.
