
In the contemporary landscape of digital media production, video editors constantly face the challenge of integrating static imagery into motion-based narratives without sacrificing viewer engagement. Traditionally, editors have relied on the rudimentary "Ken Burns" effect—a simple scale-and-pan technique that slowly zooms into a photograph. While this method prevents a total visual standstill on screen, it has increasingly become associated with low-budget productions and uninspired editing. As audience expectations driven by high-end broadcast television and sophisticated online content continue to rise, creators require more robust tools to breathe life into still media. Recent tutorials and industry insights from post-production platforms like PremiumBeat highlight a significant shift toward 3D compositing, spatial manipulation, and advanced layering in Adobe After Effects. By moving beyond flat, two-dimensional scaling, video professionals can introduce genuine depth, perspective, and atmospheric realism to archival photos, screenshots, and graphic assets. This comprehensive guide explores four advanced methods to modernize static image integration, detailing the technical workflows, software capabilities, and broader industry implications for digital storytellers.
The Evolution of Still Image Animation in Digital Media
To understand the necessity of advanced motion design techniques, one must examine the evolution of multimedia editing over the past two decades. In early digital video workflows, inserting a photograph was merely a mechanical necessity—a placeholder or a historical artifact displayed with minimal digital manipulation. The introduction of non-linear editing (NLE) software democratized basic keyframing, making the Ken Burns effect ubiquitous across documentary films, corporate presentations, and independent video essays.

However, the saturation of this basic effect has diminished its visual impact. Modern audiences, conditioned by cinematic 3D parallax effects popularized in documentary features and high-end video journalism, instantly recognize flat 2D zooming. This recognition often triggers a subconscious perception of lower production value. Consequently, post-production software developers, particularly Adobe with its continuous updates to After Effects, have prioritized robust 3D space rendering, camera controls, and compositing tools. Editors are no longer confined to the X and Y axes; they can now manipulate assets within a simulated Z-space, bridging the gap between flat photography and fully realized motion graphics.
Technique One: Establishing Spatial Depth Using 3D Texture Layers
The first and perhaps most immersive technique for breaking away from flat animations involves the integration of animated 3D textures over primary photographic assets. This method leverages parallax—the optical phenomenon where closer objects appear to move faster relative to distant background elements—to trick the human eye into perceiving true three-dimensional depth on a flat screen.
The technical workflow begins within an After Effects composition by importing a target photograph and designating it as a 3D Layer. An additional asset, such as a transparent glass, dust, or light texture, is then placed on a layer directly above the photograph and similarly converted into a 3D layer. To actualize the illusion of depth, the editor generates a new 3D Camera within the composition. By utilizing After Effects’ Custom Camera View workspace, the editor can physically manipulate the spatial coordinates of the texture layer, moving it closer to the virtual camera along the Z-axis while keeping the underlying photograph anchored in the background.
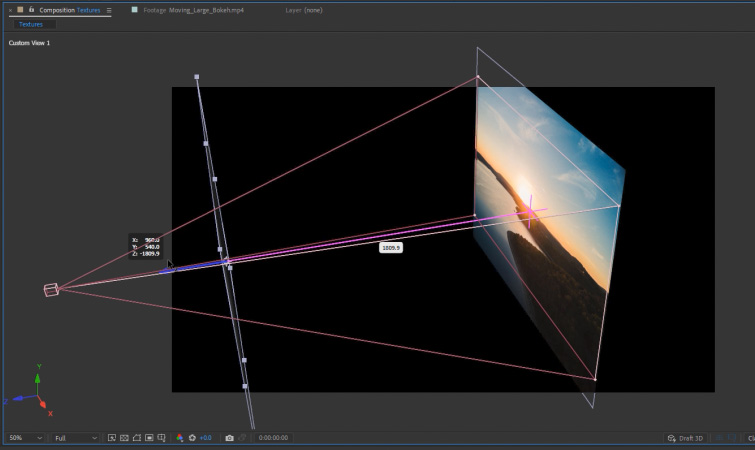
The final animation is achieved by applying keyframes to the Z-position of the camera, commanding it to push forward continuously over the duration of the clip. As the virtual camera glides through three-dimensional space, the foreground texture shifts at a visibly different rate than the background photograph, generating an organic parallax effect. This technique not only masks the static nature of the original image but also introduces a tactile, cinematic quality that elevates the overall aesthetic of the video project.
Technique Two: Simulating Hardware Environments Through 3D Screen Animation
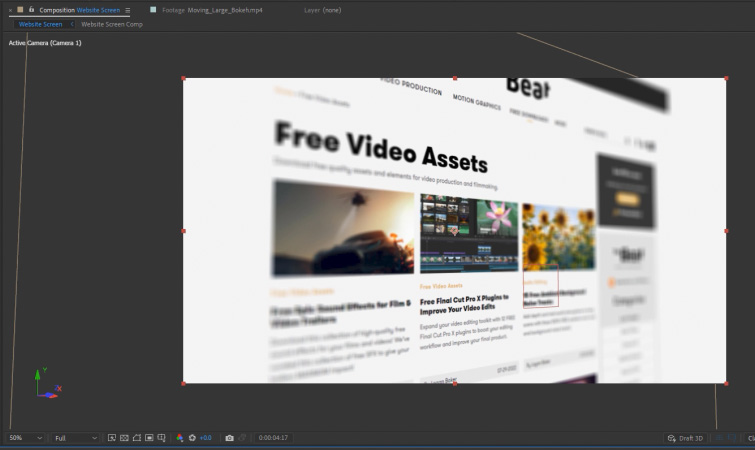
In digital journalism, corporate communications, and software-focused video content, editors frequently need to display web page captures, application interfaces, and software screenshots. Presenting these digital assets as flat, unmoving rectangles can quickly disengage viewers. To combat this, advanced editors employ 3D screen animation workflows designed to emulate a realistic physical viewing environment.
The process commences by converting a screenshot or graphic asset into a 3D layer within After Effects, followed by the creation of a two-node 3D camera. The camera is initially positioned at an acute angle, focused tightly on a specific focal point or data point within the screenshot that warrants audience attention. To streamline the subsequent animation phase, editors introduce a Null Object, convert it into a 3D layer, and parent the camera directly to it. This Null Object functions as a centralized master controller for the camera’s spatial coordinates and rotational values.
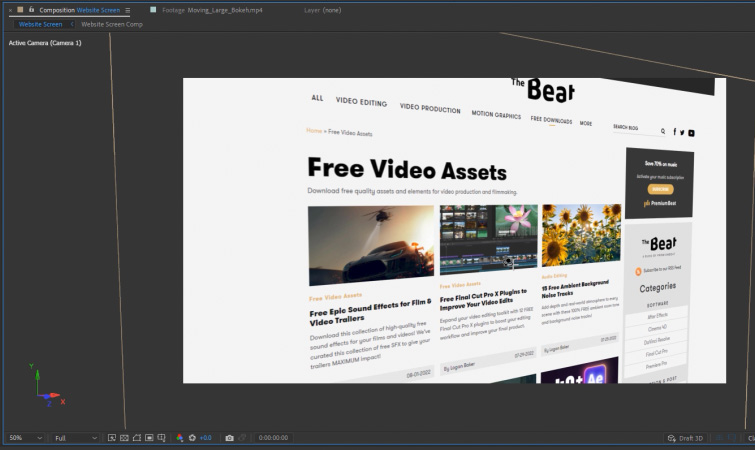
By applying keyframes exclusively to the Y-rotation of the Null Object, the editor initiates a smooth, sweeping rotational pan across the surface of the screenshot. To refine this motion, professionals routinely apply "Easy-Ease" keyframe interpolation and utilize the After Effects Graph Editor to manually adjust velocity curves, eliminating mechanical starts and stops. As a final polish, enabling Depth of Field (DoF) on the 3D camera allows editors to manipulate the Focus Distance parameter, ensuring the animation resolves precisely on the intended area of interest while blurring out-of-focus peripheral elements.
Technique Three: Directing Viewer Attention with Advanced Masking and Color Isolation
While 3D compositing offers immense depth, traditional 2D manipulation techniques remain highly effective when executed with precision. One of the most powerful ways to energize a static photograph is through subject isolation via masking. By separating the primary subject of an image from its background, editors unlock the ability to animate foreground and background elements independently.
The workflow requires meticulous rotoscoping or mask creation around the primary subject using After Effects’ pen tool or automated selection brushes. Once the subject exists on an isolated layer separate from the background plate, subtle independent transformations—such as minute scaling, position drifts, or simulated breathing motions—can be applied to each layer.
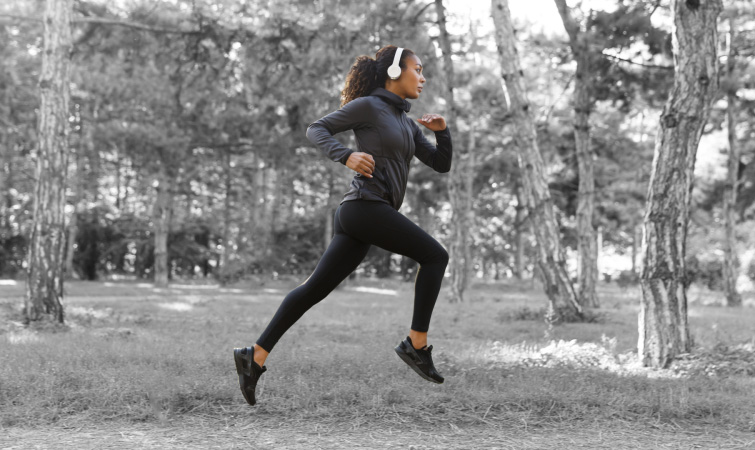
To maximize the psychological impact of this technique, editors often apply selective color grading. By desaturating the background plate entirely or converting it to black and white while keeping the isolated foreground subject in full, vibrant color, the creator artificially generates a shallow depth-of-field look reminiscent of high-end cinematic cinematography. This deliberate contrast forcibly guides the viewer’s eye to the narrative focal point of the image, transforming a passive photograph into an active storytelling device.
Technique Four: Atmospheric Integration via Animated Overlays
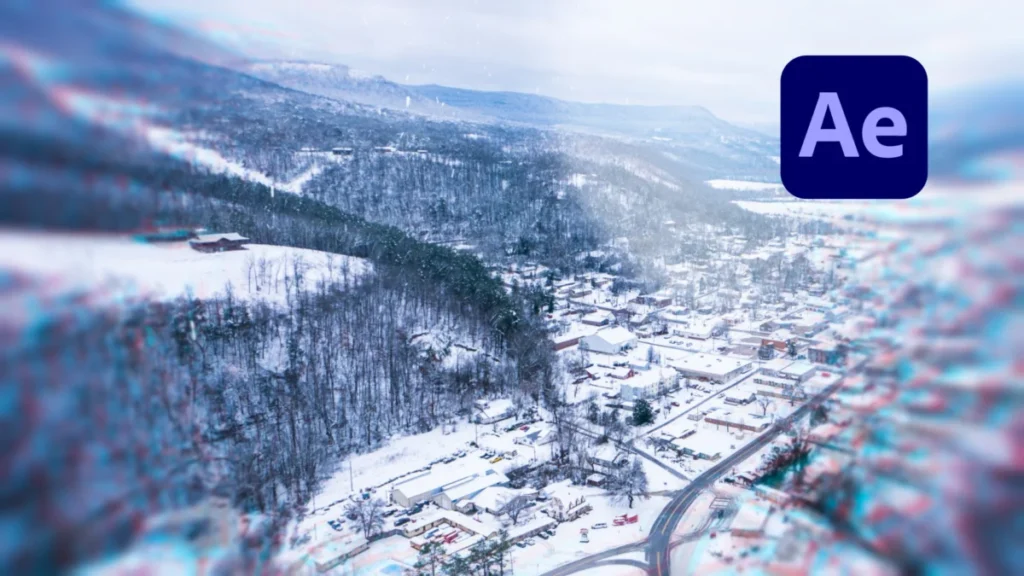
The final methodology for enhancing static imagery involves the strategic layering of atmospheric elements, commonly referred to as overlays. Still photographs often fail to blend seamlessly into video timelines because they lack the organic environmental movement—such as flickering light, drifting dust, falling snow, or atmospheric haze—inherent to video footage.
By introducing animated overlays above a static image and adjusting their blending modes (typically to Screen, Add, or Multiply depending on the underlying luminance values), editors can instantly unify disparate visual elements. Common industry-standard overlays include bokeh light leaks, anamorphic lens flares, god rays, and particulate weather effects.
The inclusion of continuous motion in the overlay layer tricks the human visual cortex into perceiving the entire composite frame as a dynamic, living environment. This technique is particularly valuable in historical documentaries, narrative video essays, and promotional edits where archival photographs must coexist seamlessly with high-definition video footage without creating jarring visual discrepancies.
Industry Implications and the Future of Motion Design
The continuous refinement of techniques like 3D texture mapping, screen simulation, subject masking, and overlay integration highlights a broader trend within the post-production industry: the democratization of high-end visual effects. Tools that were once exclusive to high-budget feature film studios and specialized motion design houses are now readily accessible to independent creators, digital journalists, and corporate media teams through standardized software suites like Adobe After Effects.
As content consumption rates accelerate across digital platforms, viewer retention relies heavily on visual dynamism. Research in media psychology indicates that sustained motion and spatial depth significantly reduce cognitive fatigue and enhance information retention during video-based presentations. Consequently, mastering advanced 2D and 3D image animation is no longer merely an aesthetic preference for video editors; it has become a fundamental competency in the modern digital media landscape. By moving beyond the limitations of the traditional Ken Burns effect, creators can elevate standard photographic assets into compelling narrative components that capture and hold audience attention in an increasingly crowded media ecosystem.